| |

Google Classroom Tutorial
What is Google Classroom?Google Classroom is a free web-based tool developed by Google. It was introduced on 12th August in the year of 2014. It is mainly used by the teachers and students, for sharing the files between them. In the Google Classroom, teachers can create the assignments for the students, and can also collect the assignments from them. Both the teacher and student can work without the use of papers in this application. The main objective of making a Google Classroom is to create, grade, and distribute the assignments in a paperless way. This web-based application also integrates with the other tools of Google like Google Drive and Google Docs. Within this application, students and teachers can easily communicate with each other, and the faculty/teacher can also track the progress of each student. This application uses Google Drive for creating and distributing the assignments, Google Docs for writing the sheets and slides, Google mail for the conversation or communication, and the Google calendar for scheduling. Uses of Google ClassroomFollowing are the different uses of Google Classroom:
Features of Google ClassroomFollowing are the various features of the Google Classroom:
Sign in and Set up a Google ClassroomSign-in is the first step for both teachers and students to enter in the Google Classroom. You can only use this service with an active internet connection. You can sign-in into the classroom with the following types of account:
Sign in the Google Classroom on a Computer system or LaptopIf you are either a teacher or a student, and you are using a laptop or PC, then you must have to follow the given steps to sign in: Step 1: Firstly, you have to open any web browser by clicking on the browser icon in your system. We have opened the Google Chrome browser in our system as shown in the following screenshot. 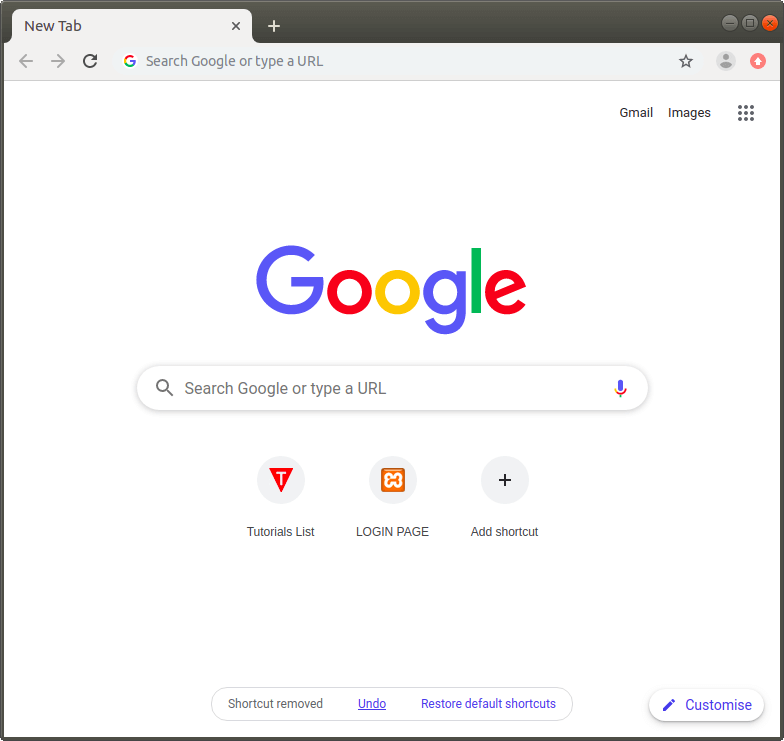
Step 2: Now, you have to type the Classroom.google.com URL in the address bar of the web browser as shown in the following screenshot. After typing the URL, press Enter. 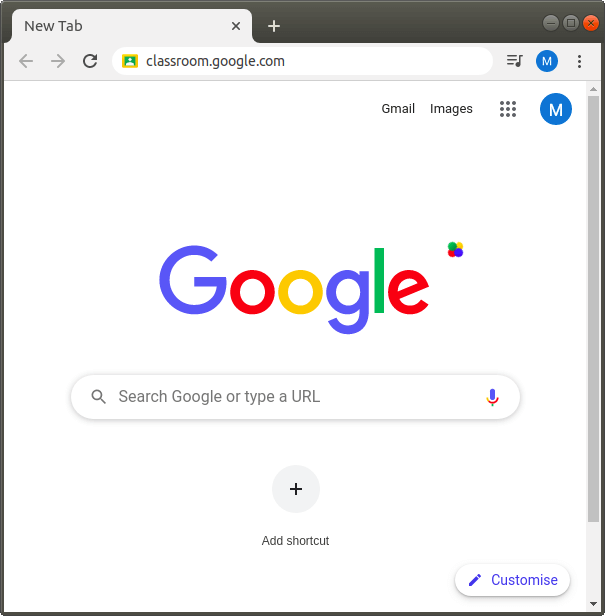
Step 3: Now, click on the Go to Classroom button. Step 4: Now, enter the email address of your Google account in the Email or Phone field and click on the Next button. 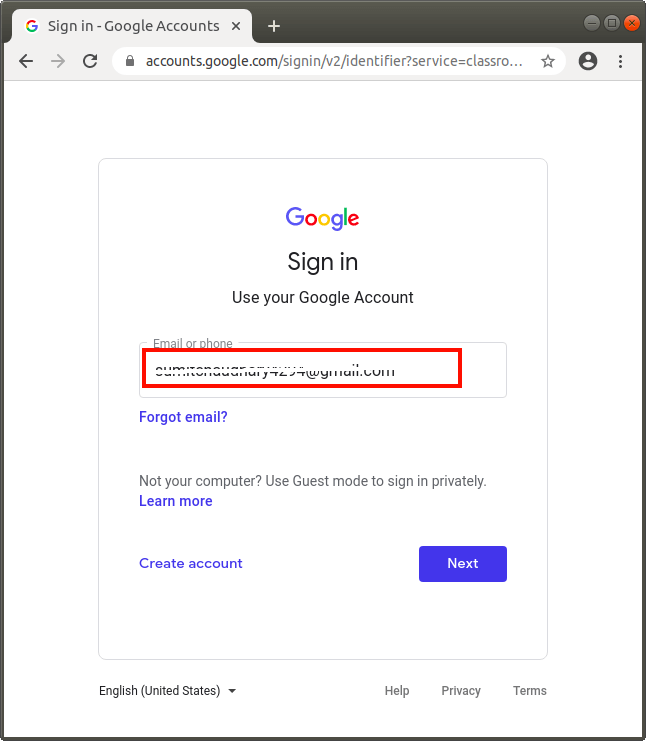
Step 5: Now, you have to enter the password of your Google account. And, again click on the Next button. 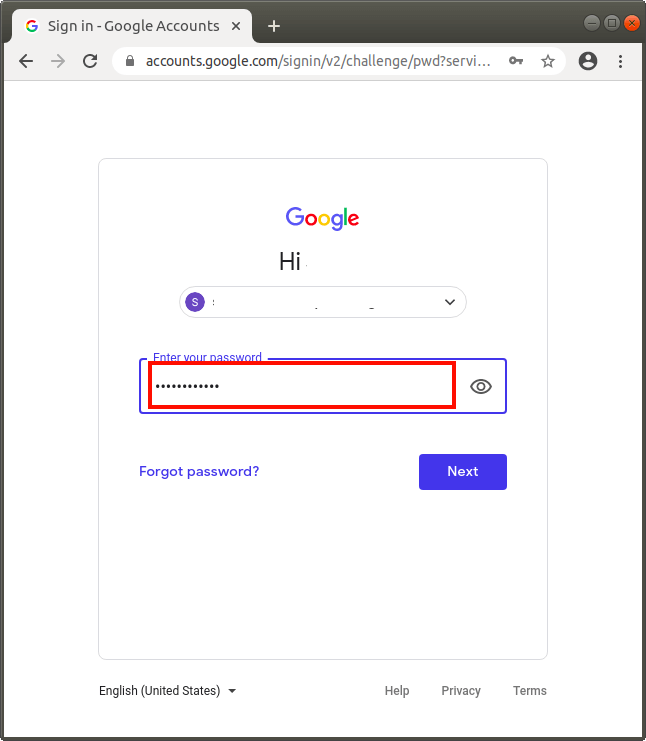
Step 6: After clicking, you are successfully logged in the Google Classroom. You can also see the same page on your computer's screen as shown in the following screenshot. 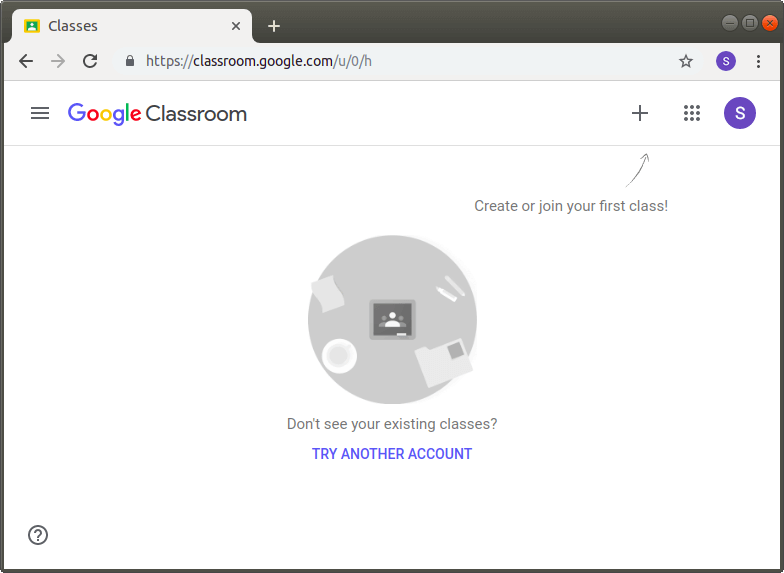
Sign in Google Classroom on an Android MobileIf you are either a teacher or a student, and you have to use the Google Classroom on your Android device, firstly you have to download and install the application of Classroom using the following two steps:
After the downloading and installing of Google Classroom app, you have to follow the given steps for signing into the Google Classroom: Step 1: Tap the Classroom App on your android device. Step 2: Now, Tap the GET STARTED button. 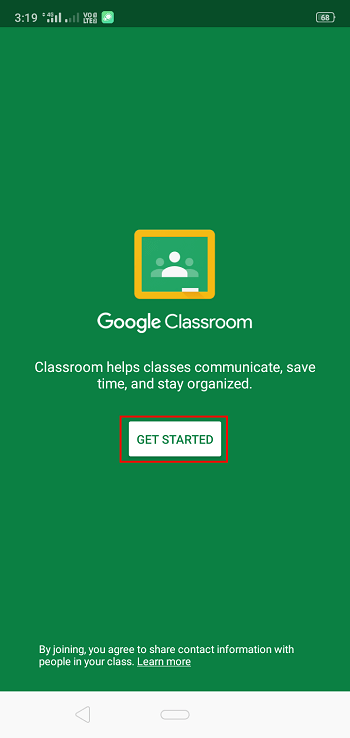
Step 3: Now, tap on the Add account option for adding a Google account in the Google Classroom. Now, click on the OK button 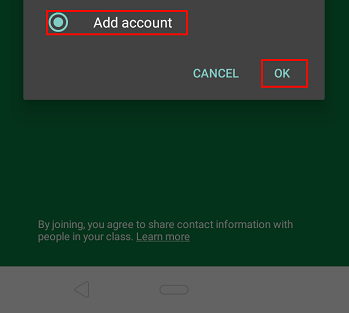
Step 4: Now, you have to enter the email address of your Google account. Now, tap on the Next button. 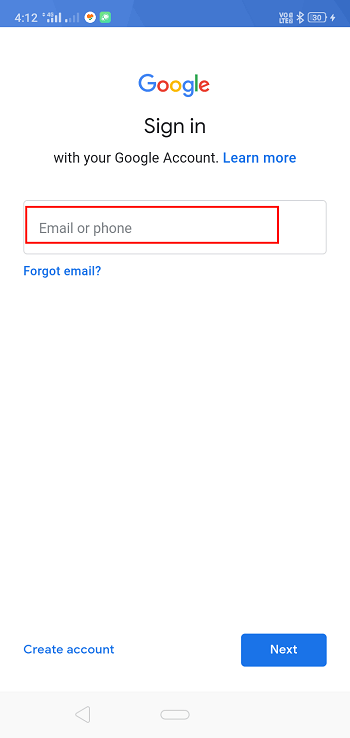
Step 5: On this screen, you have to type the password of your Google account. Now, again tap on the Next button. 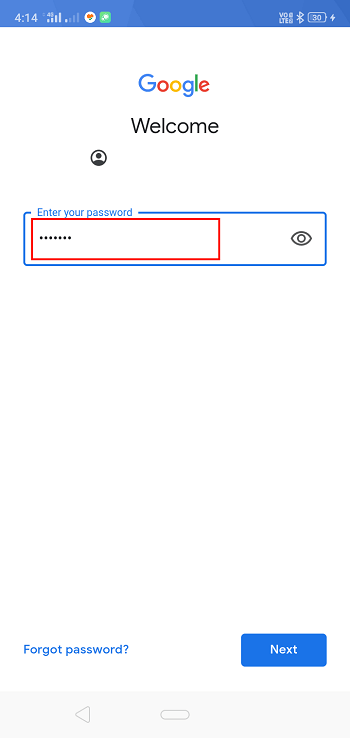
Step 6: After tapping, you are successfully logged in the Google Classroom on your android device. You also see the same screen on your android device as shown in the following screenshot. 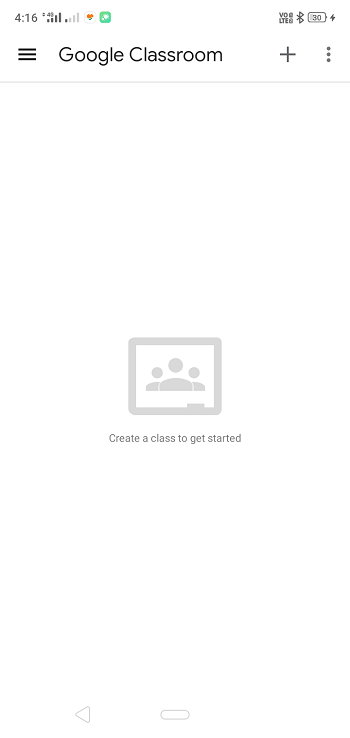
Explore the Home Screen of Google ClassroomThe following screen is the home page of Google classroom, which consists of the following functions. This page is visible for both teacher and a student.

Create a ClassIf you are a teacher, and you have to use a Google Classroom for sharing the assignments with your class students, then firstly you have to create a class after sign in the Google Classroom. When you successfully sign-in the Google Classroom, then you have to follow the given steps to create a class: Step 1: Click the + (Add) button, which is located in top-right on the home page of the Google Classroom, as described in the following snapshot. 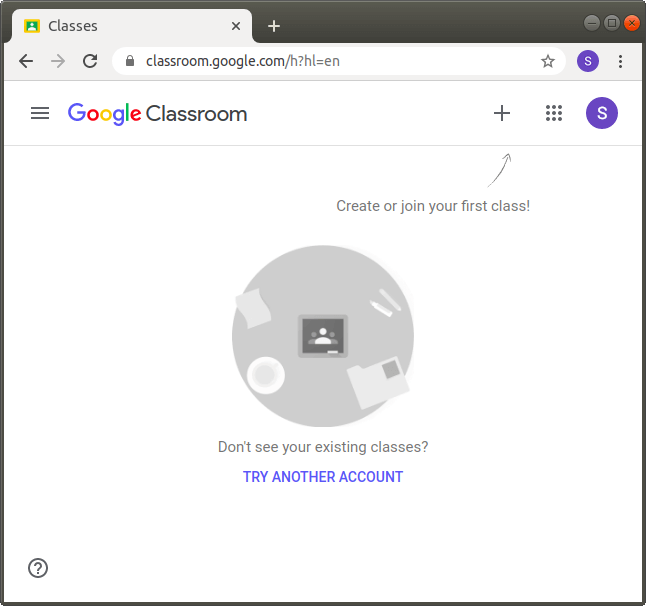
Step 2: Select and click the 'Create Class' button. 
Step 3: Now, select the checkbox button, and click on the Continue button. 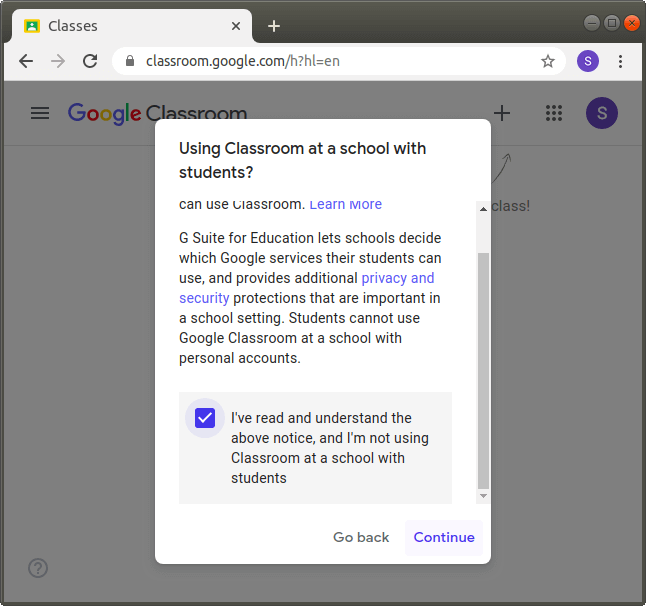
Step 4: After clicking, you have to enter the four fields as shown in the following screenshot. 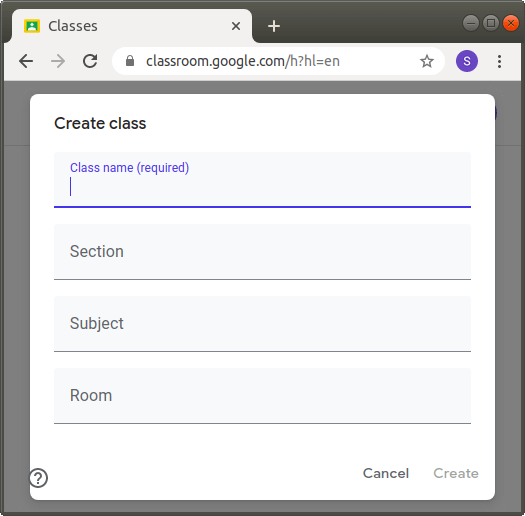
Step 5: We enter the class name. The Class name field is required. You have to give the name of the class which is meaningful to you and your class students. 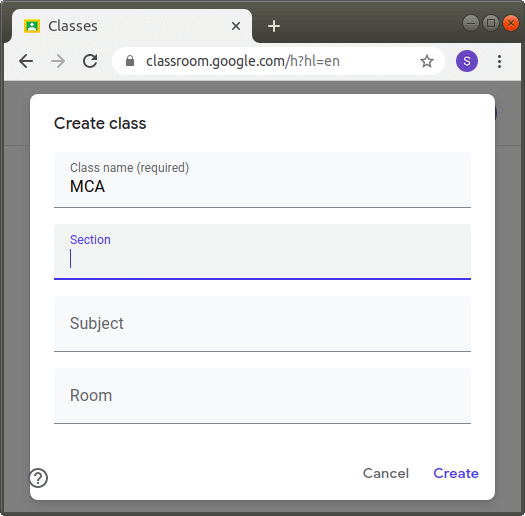
Step 6: After filling the class name, we fill the section. To fill the section field, click on the Section, and enter the details. This field is optional. 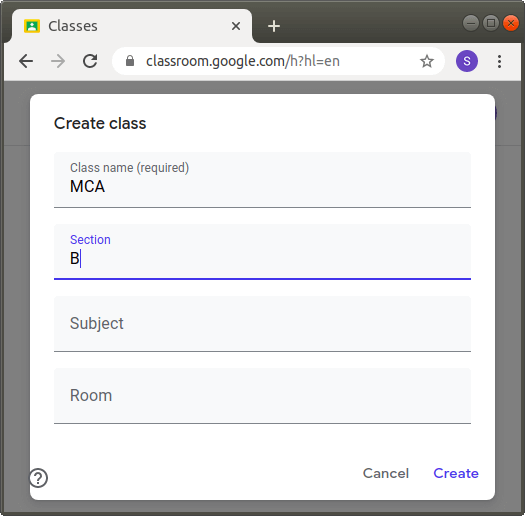
Step 7: Now, we fill the subject, by clicking on the Subject. This field is also optional, you may be or may not enter the value in this field. 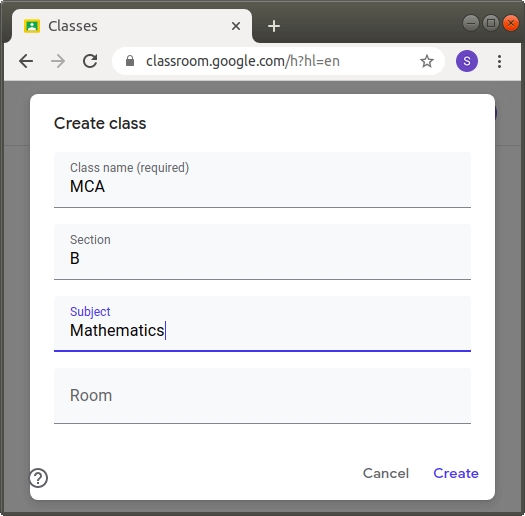
Step 8: Now, we enter the number of room number in which the class students are taught. This field is also optional. 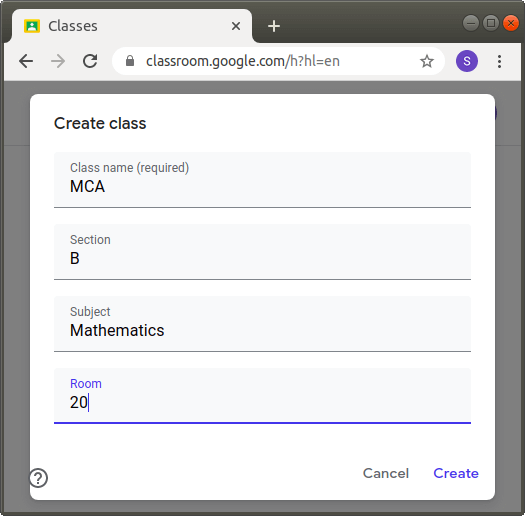
Step 9: And at last, click on the Create button. 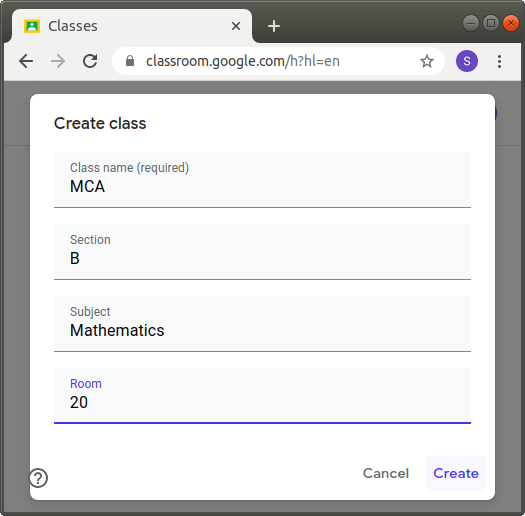
After clicking, your class is created automatically by the Google Classroom, and you will see the same screen on your computer as shown in the following screenshot: 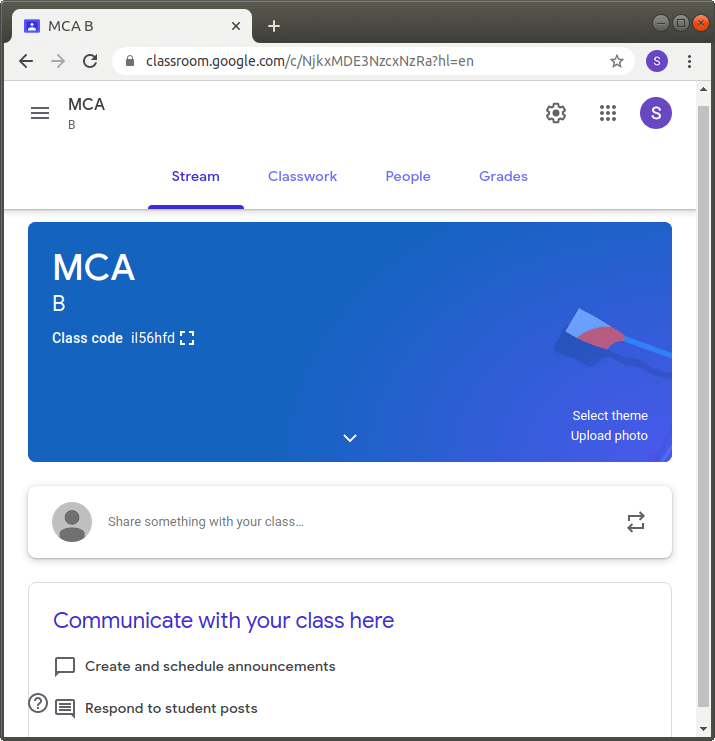
After the creation of a class, the code is automatically generated by the Google Classroom, which helps your students for joining a class. And, you can also easily invite the students of your class for sharing the announcements and assignments in the Google Classroom. Join a ClassIf you are a student, and you have to join the class which is created by your teacher. Firstly, you have to sign in the Google Classroom, by your active mail Id. You can easily use the following two ways to join a class:
Join a Class with a Class codeThe class code is a code which is automatically created by the Google classroom at the time when your teacher creates a class. Your teacher gives this code to you for joining a class. When you successfully sign-in the Google Classroom, then you have to follow the given steps to join a class with the help of given class code: Step 1: Click the + (Add) button, which is located in top-right on the home page of the Google Classroom, as described in the following snapshot. 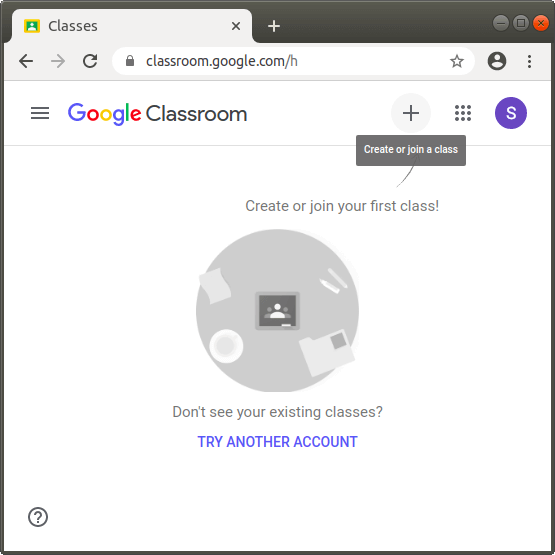
Step 2: Select and click the 'Join Class' button. 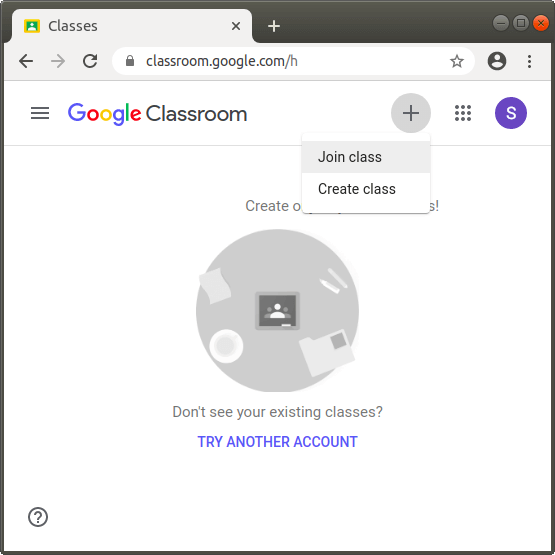
Step 3: Now, enter the Class code which is given by the teacher. And, then click the Join button. 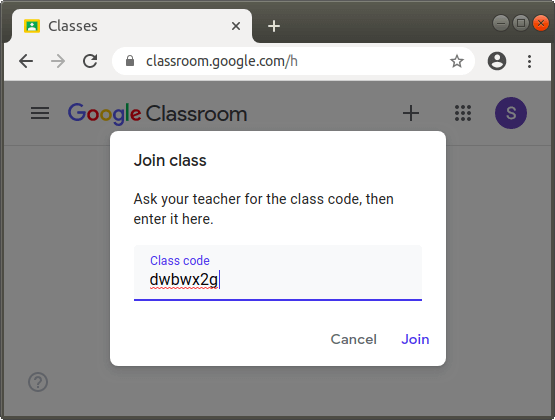
Step 4: After clicking, you are successfully joined in the class, which is created by your teacher. And, you can receive the assignments and announcements. When you successfully joined in any class of google classroom on one device, then you are automatically enrolled in that class on all the devices, where google Classroom run. Join a Class by accepting an invitationYou can also easily join the class by accepting an invitation which is sent by your teacher. When you successfully sign-in the Google Classroom, then you have to follow the given steps to join a class by accepting the invitation: Step 1: Open your Account on which your teacher sends an invitation. Step 2: Click the mail and click on the Join button. Step 3: After clicking, you are successfully joined in a class, whose invitation is sent by your teacher. Invite the students to a classIf you are a teacher and you have to invite your students to join a class, then you have to follow the given steps: Step 1: Firstly, sign in the Google Classroom with your Google classroom id. Step 2: Then, click on the Classes tab in the classroom menu, which is located at the top right corner in the Google Classroom screen. 
Step 3: Now, click on that class in which you want to add the students or group of students. 
Step 4: Now, click on the People tab, which is present at the top of the screen as shown in the following screenshot: 
Step 5: Then, click on the Invite Students button as shown in the below screenshot: 
Step 6: Now, enter or type the email address of a student or a group. And, then click on the search result. After it, click the Invite button. 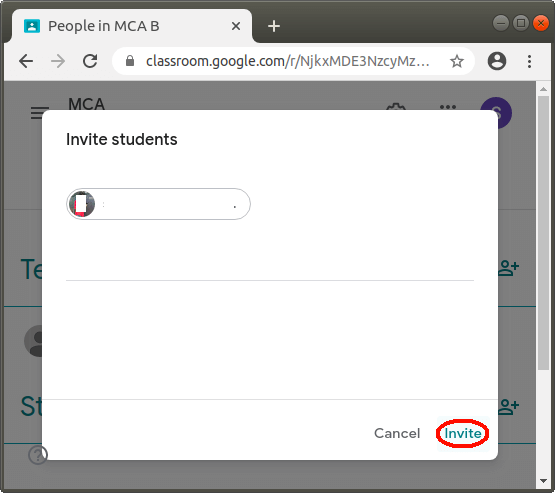
Step 7: If you want to invite more students in the same class, follow steps 5 and 6. Step 8: After the invitation sent to the students, then the invited students are shown in the Students list, as described in the following screenshot. Remove a Student from a ClassIf you are a teacher and you have to remove a student from your class in a Google Classroom, then you have to follow the given steps: Step 1: Firstly, sign in the Google Classroom with your Google classroom id. Step 2: Then, click on the Classes tab in the classroom menu, which is located at the top right corner in the Google Classroom screen. 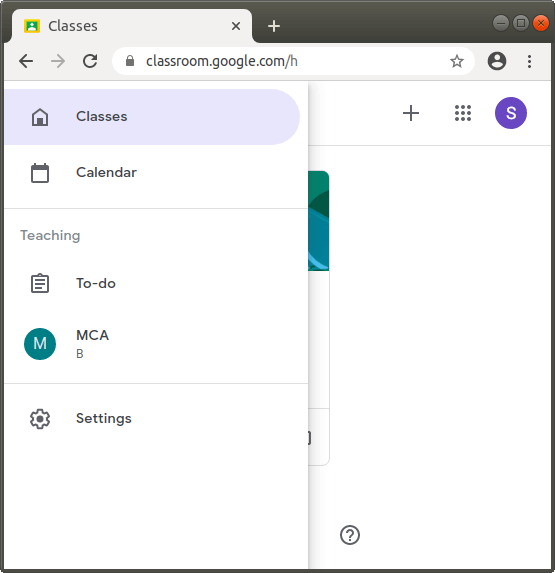
Step 3: Now, click on that class from which you want to remove a student or students. 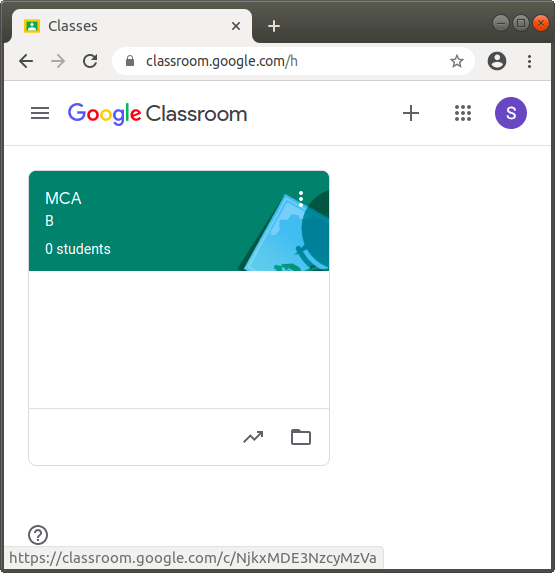
Step 4: Now, click on the People tab, which is present at the top of the screen as shown in the following screenshot: 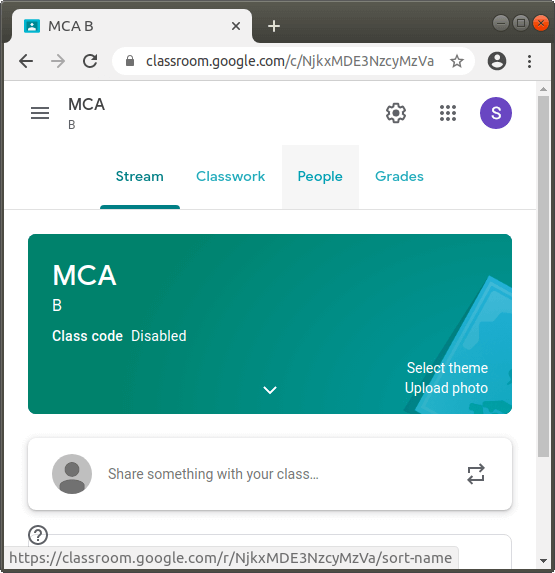
Step 5: Now, Click on the checkbox, which is next to the student or students for removing. 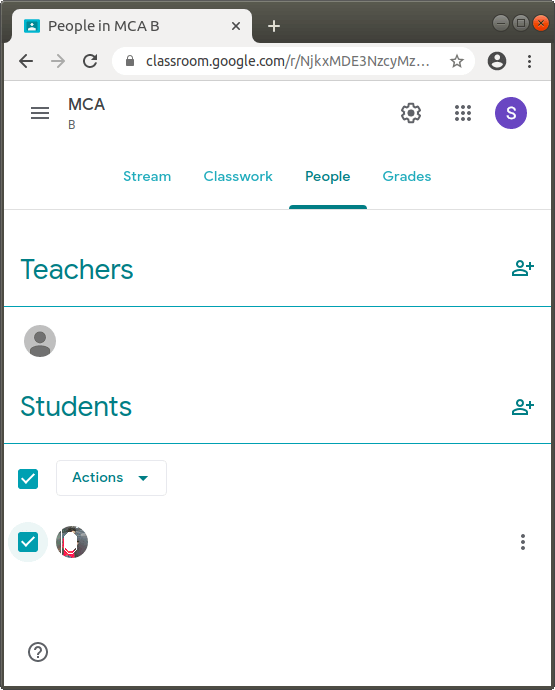
Step 6: Now, click on the Actions. And, then click on the Remove button. 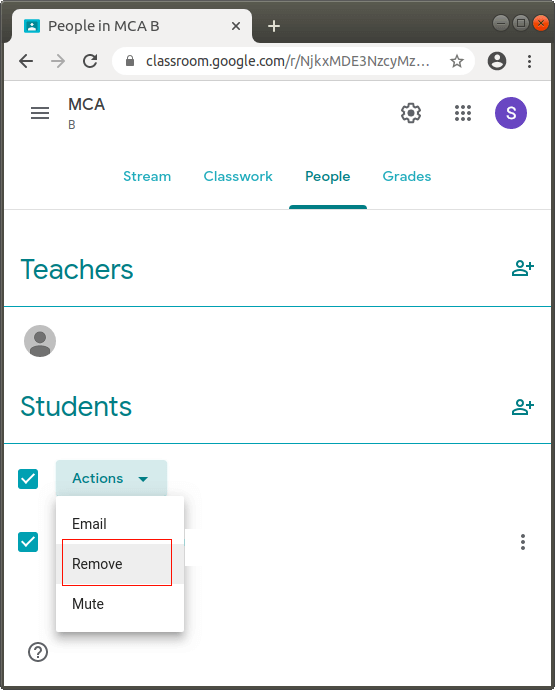
Step 7: After clicking, a confirmation dialog box will appear, click the Remove button again. 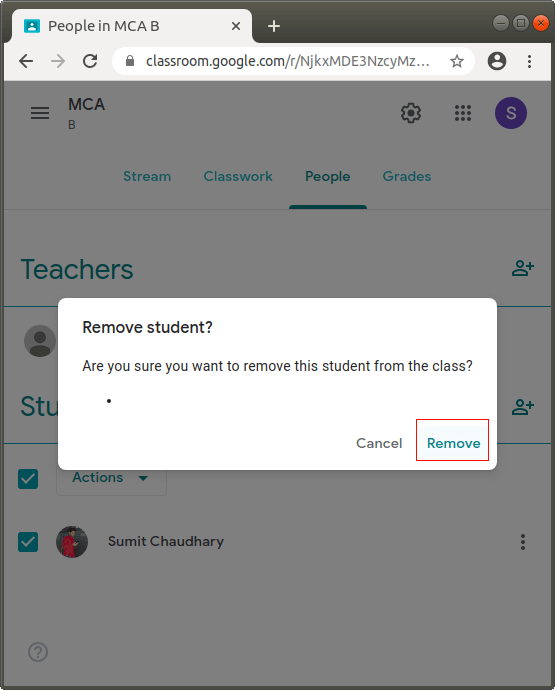
Step 8: After then, you see that the student is successfully removed from the class. Archive a ClassIf you are a teacher and you want to know how to archive or hide the class in a Google Classroom, then you have to learn this section. When any class is archived, then that class is also archived for all those students and teachers who are enrolled in that. You can also restore the archived class if you want to use that class again. Now, you have to follow the given steps to archive any class in your Google Classroom: Step 1: Firstly, sign in the Google Classroom with your Google classroom id. Step 2: Then, click on the Classes tab in the classroom menu, which is located at the top right corner in the Google Classroom screen. 
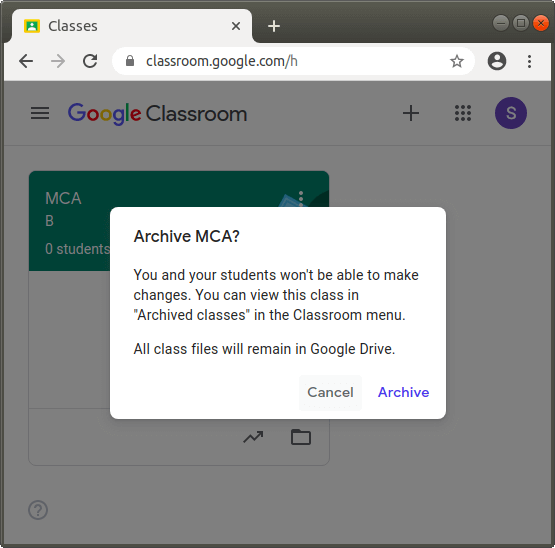
Step 3: Now, click on the More option in that class card, which you want to archive. 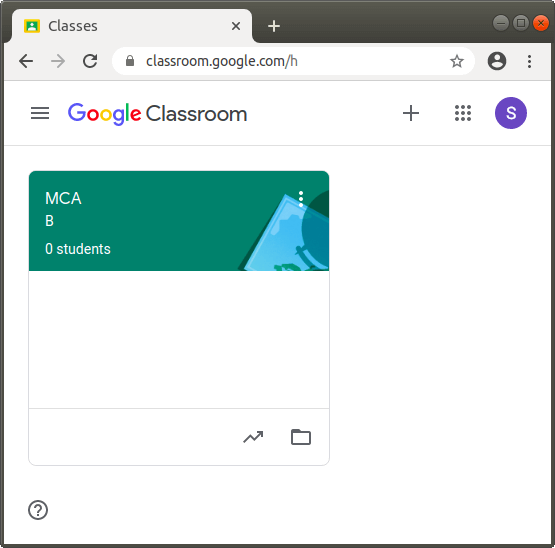
Step 4: Then, click on the Archive option in the drop-down list. After clicking, you have to click on the Archive button in the confirmation dialog box. 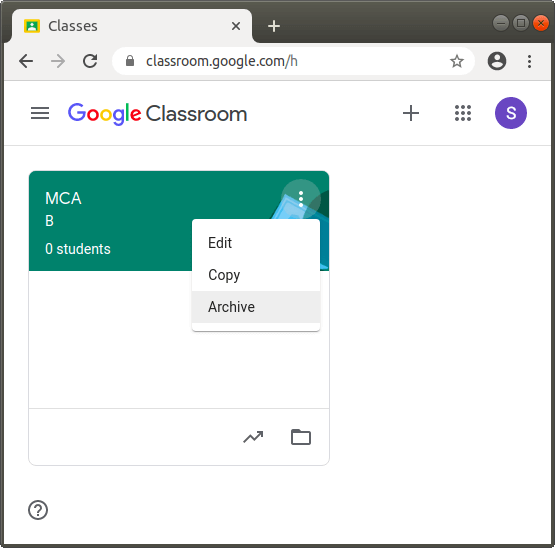
Step 5: After that, your class is successfully archived. And you can also restore it from the Archived Classes tab, which is available in the classroom menu. Delete a ClassIf you are a teacher and you want to know how to delete a class from a Google Classroom, firstly you have to learn how to archive a class, because any class can be deleted only after it is archived. The following steps are used to delete a class: Step 1: Firstly, sign in the Google Classroom with your Google classroom id. Step 2: Then, click on the Archived Classes tab in the classroom menu, which is located at the top right corner in the Google Classroom screen. 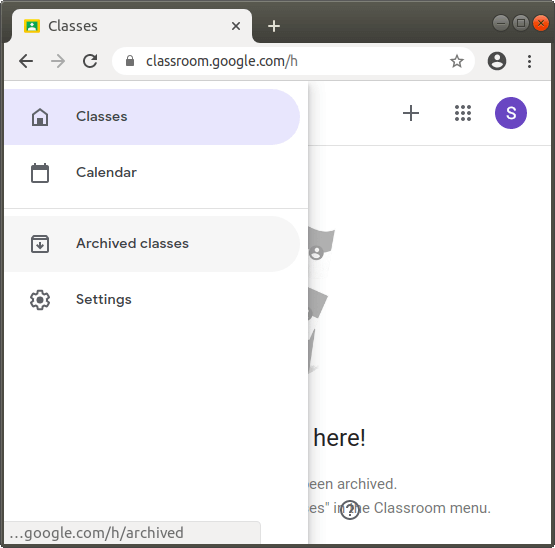
Step 3: Now, click on the More option of that class card, which you want to delete. 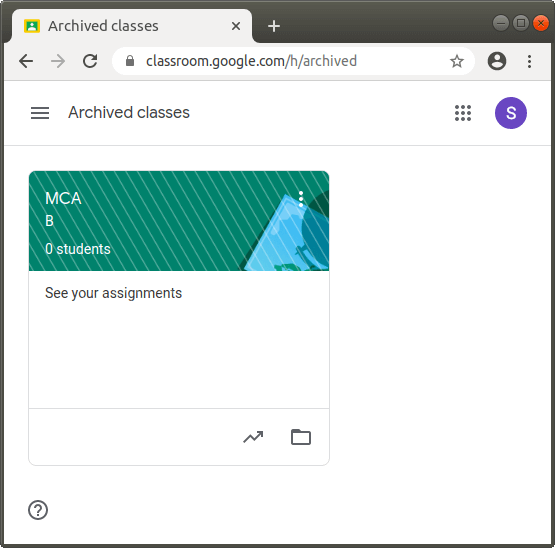
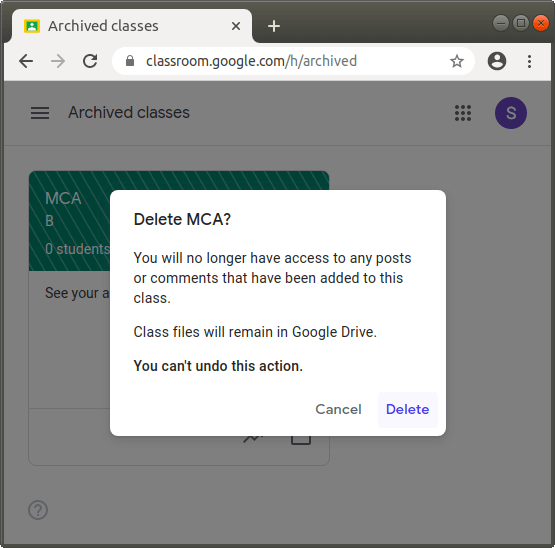
Step 4: Then, click on the Delete option in the drop-down list. After clicking, you have to click on the Delete button in the confirmation dialog box. 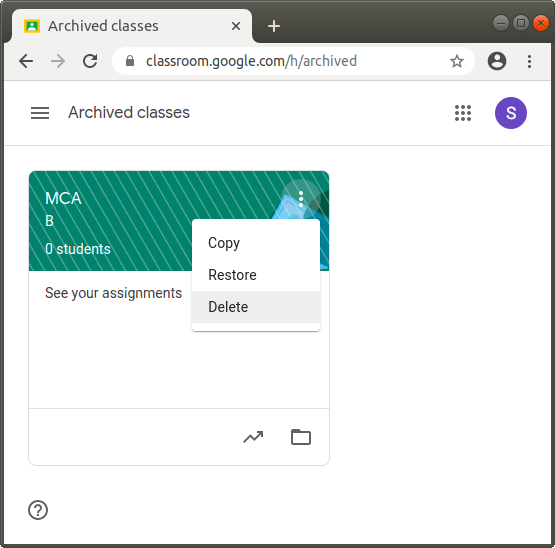
Step 5: After that, your class is successfully deleted. Create an AssignmentIf you are a teacher and you want to create the assignments for the students in a class of Google Classroom, then you have to learn this section. You can easily create an assignment with various following functions after reading this section:
To create an assignment in a google Classroom, follow the steps which are given below: Step 1: Firstly, sign in the Google Classroom with your Google classroom id. Step 2: Then, click on the Classes tab in the classroom menu, which is located at the top right corner in the Google Classroom screen. 
Step 3: Now, click on that class in which you want to create the assignments or post the assignments to the students. 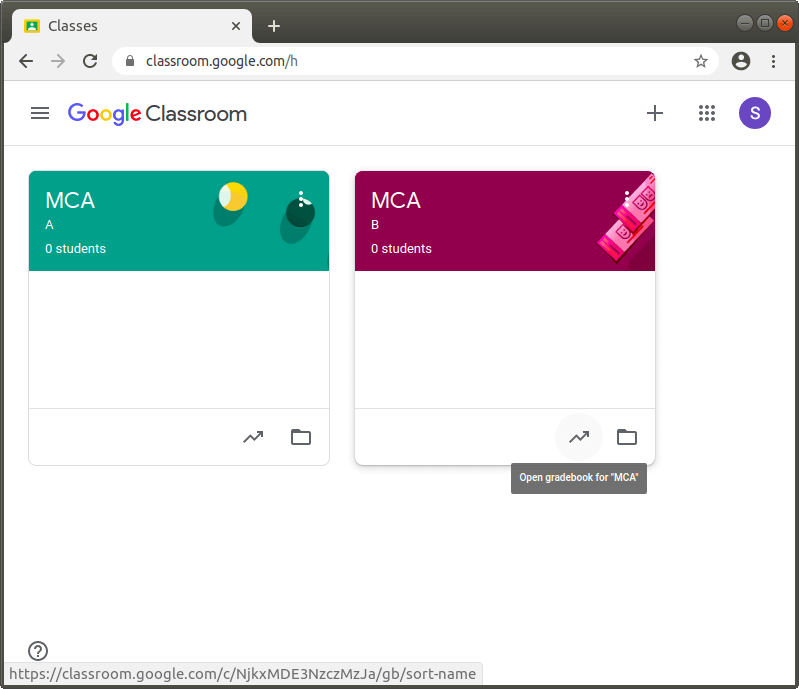
Step 4: After that, click on the Classwork tab, which is present next to the Stream tab at the top of the screen as shown in the following screenshot: 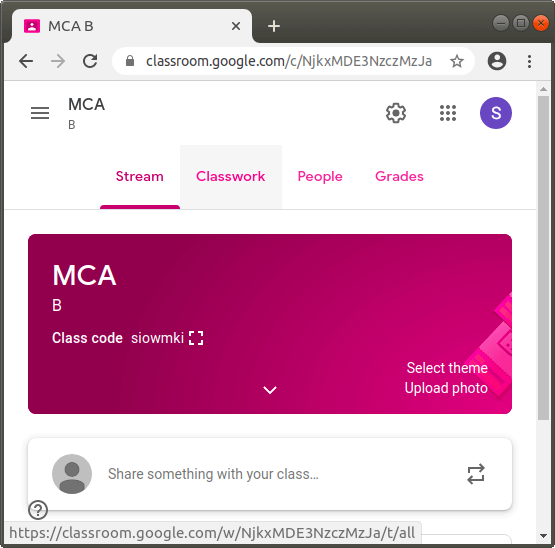
Step 5: Now, click on the Create button, and then click on the Assignment option in the drop-down list. 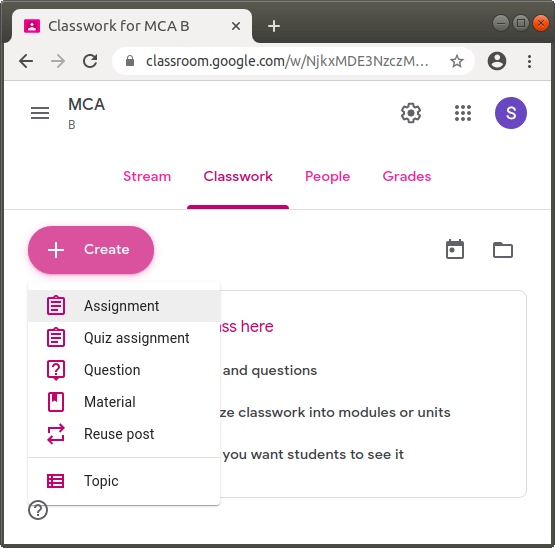
Step 6: After clicking, we will move to the following screen, in which we have to enter the title of an assignment, by clicking on the Title. And, if you want to give the instructions on how to do the assignment, then enter the instructions by clicking on Instructions (optional). 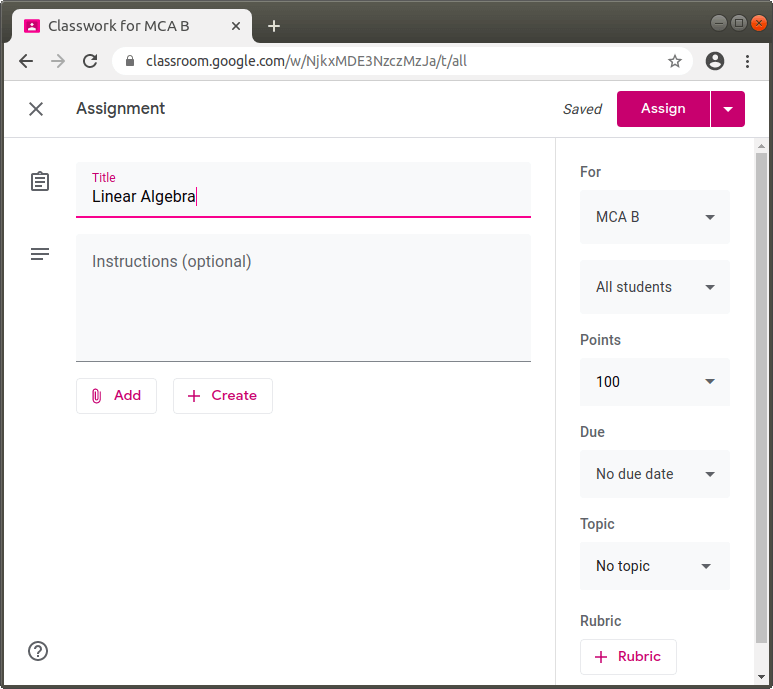
Step 7: If you want to post an assignment to one or more classes, then you have to follow the two steps which are given below. Otherwise, go to step 8: Step i): Firstly, click on the button down arrow ▼, which is under 'For'. We describe it in the following screenshot: 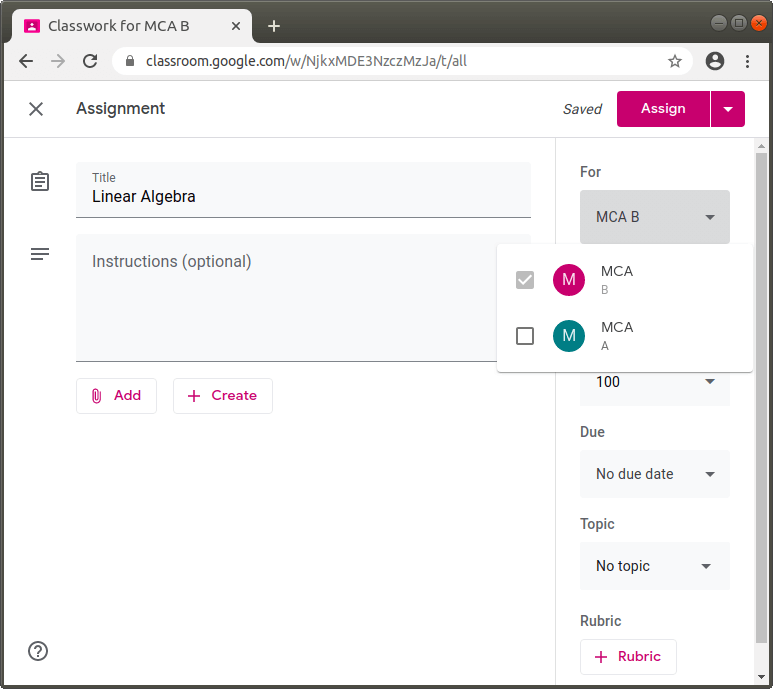
Step ii): After clicking, select the class or classes by clicking on the checkbox, in which you want to share or post the assignment. 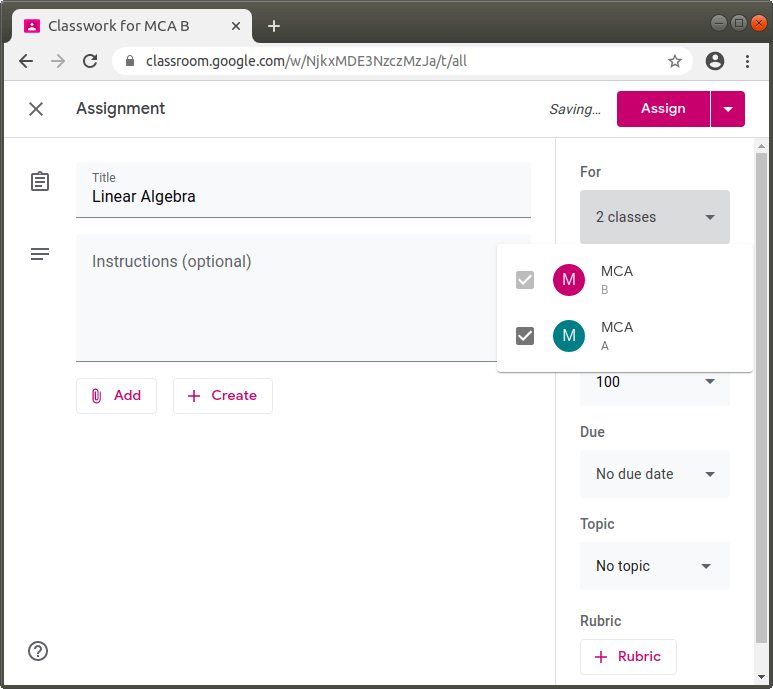
Step 8: If you want to post the assignment to the individual students, then you have to follow the two steps which are given below. Otherwise, go to step 9. At a time, you can only post an assignment to less than 100 individual students in a class. Step i): Firstly, click on the button 'All students▼', as shown in the following screenshot: 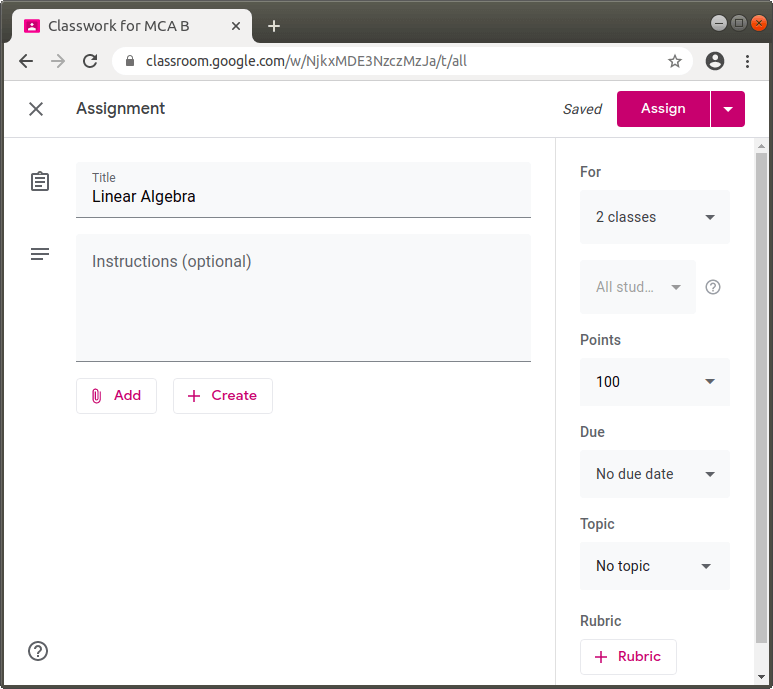
Step ii): After clicking, select those students individually, whom you want to post the assignment. You must deselect the all students option. Step 9: If you want to post an assignment by adding a due date and time, then you have to follow the three steps which are given below. Otherwise, go to step 10. Step i): Firstly, click on the button down arrow▼, which is under 'Due'. We describe it in the following screenshot: 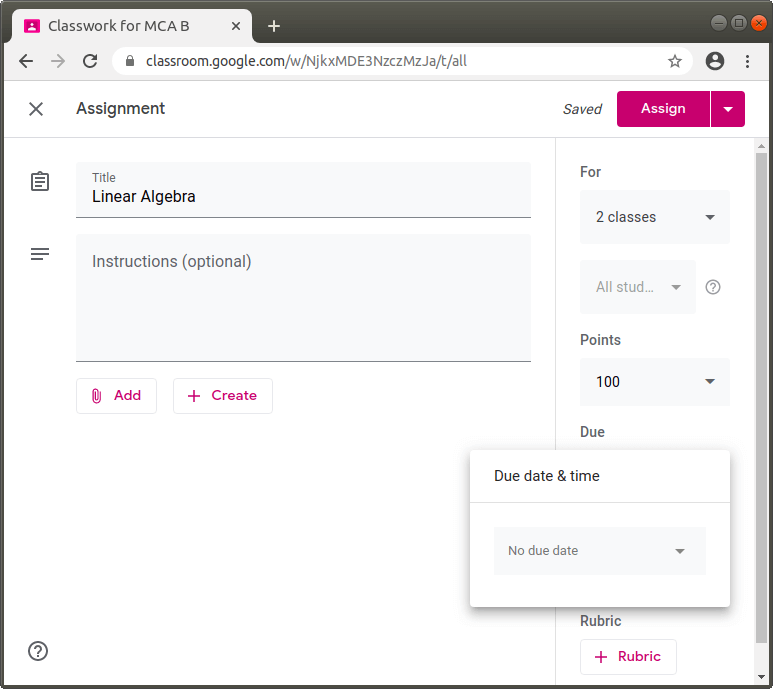
Step ii): Now click again on the down arrow▼, which is next to No due date. Then select and click on the particular date in the calendar. 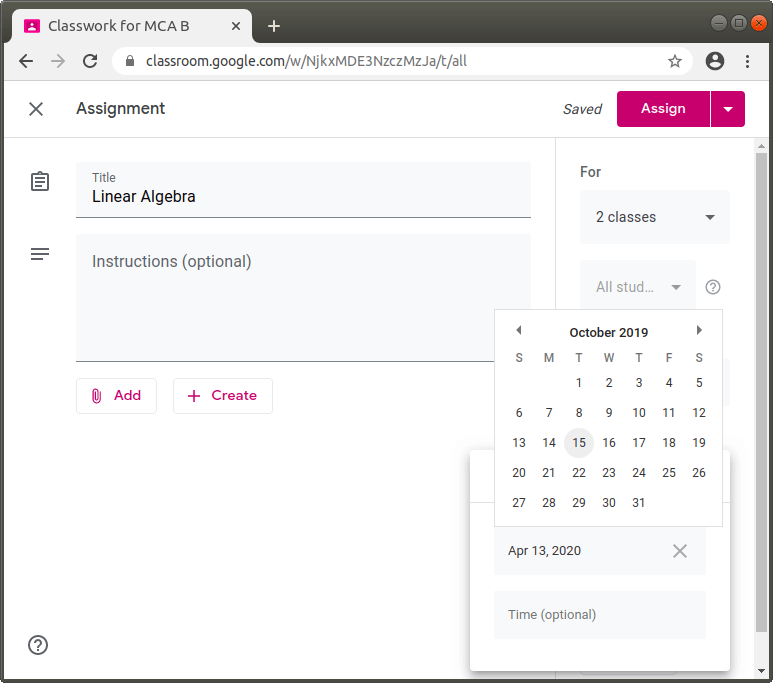
Step iii): You can also set a time, by clicking on the Time (optional). Enter the time by specifying an AM or PM. 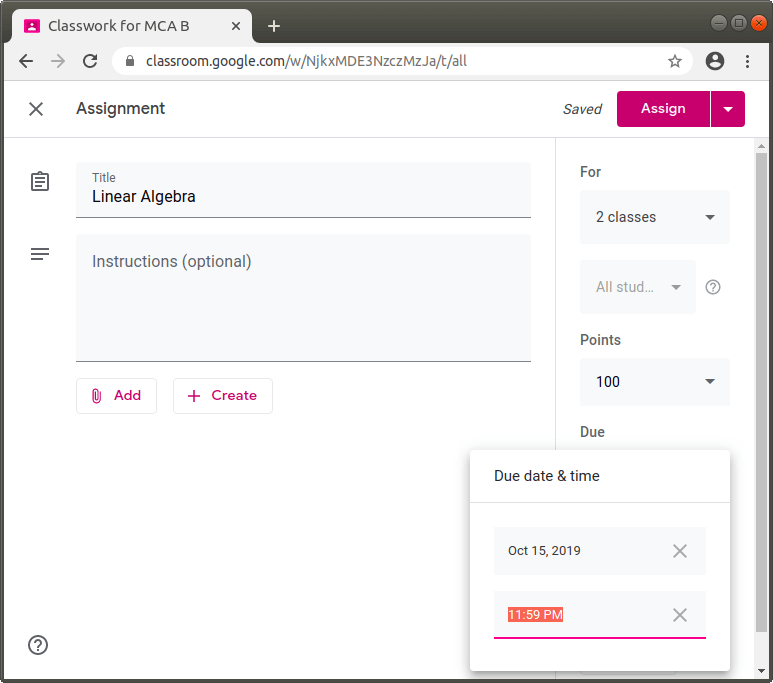
Step 10: If you want to add a topic to your assignment, then you have to follow the two steps which are given below. Otherwise, go to step 11. we can only specify one topic to one assignment. Step i): Firstly, click on the button down arrow▼, which is under 'Topic'. We describe it in the following screenshot: 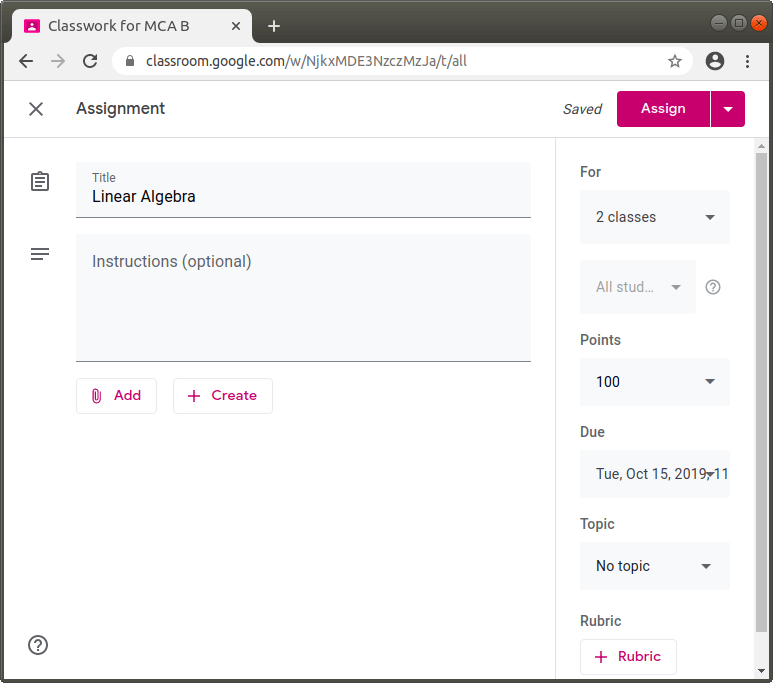
Step ii): Now, click on the Create topic option, and type the name of the topic. After then, the topic is successfully added to your assignment. 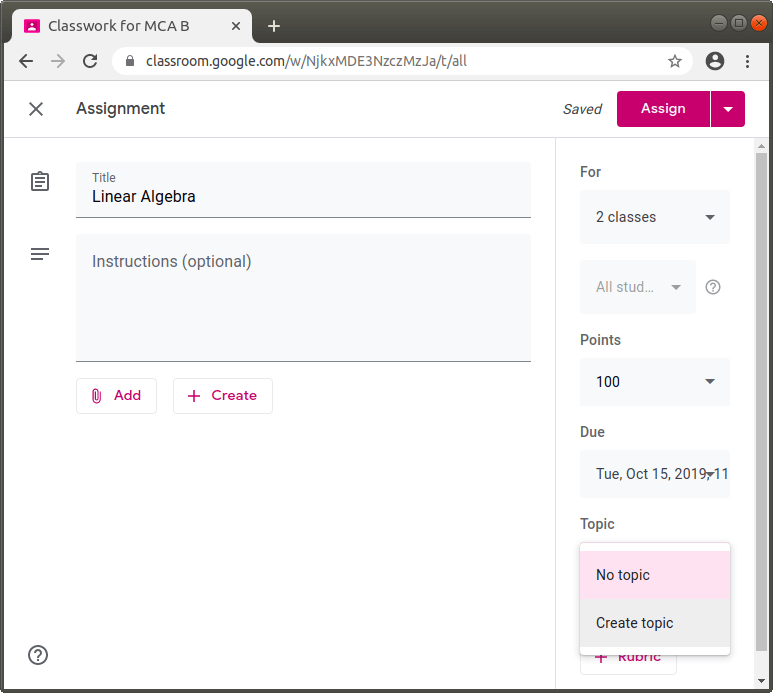
Step 11: If you want to add the attachments to your assignment, then you have to learn this step. Otherwise, go to step 12. You can easily add the files from your computer and google drive, links and videos of YouTube. 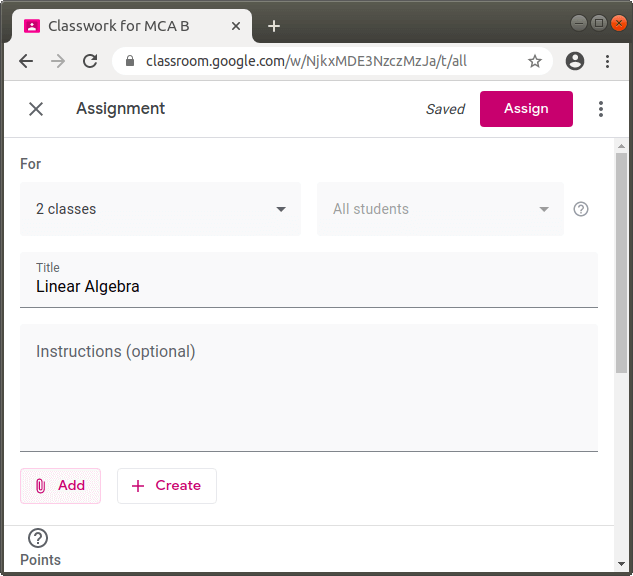
Add a file From your computerFollow the given steps for adding the file in your assignment from the device: Step i): Click on the add button. Then click on the File option in the drop-down list. 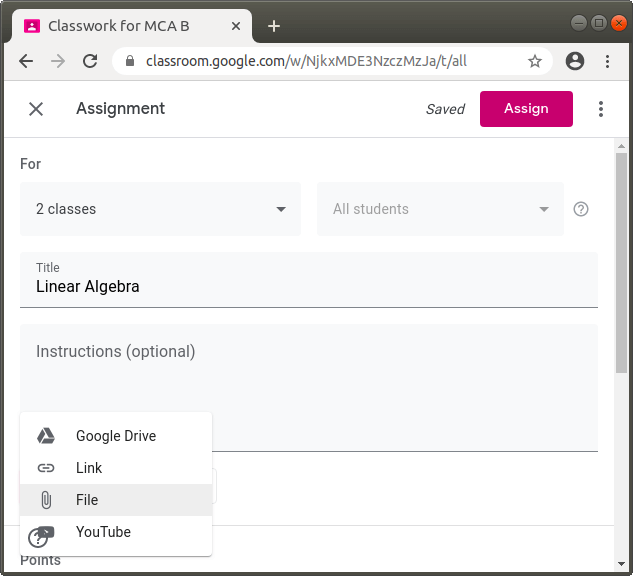
Step ii): After selecting the file from the device, click on the Upload button for uploading the file. 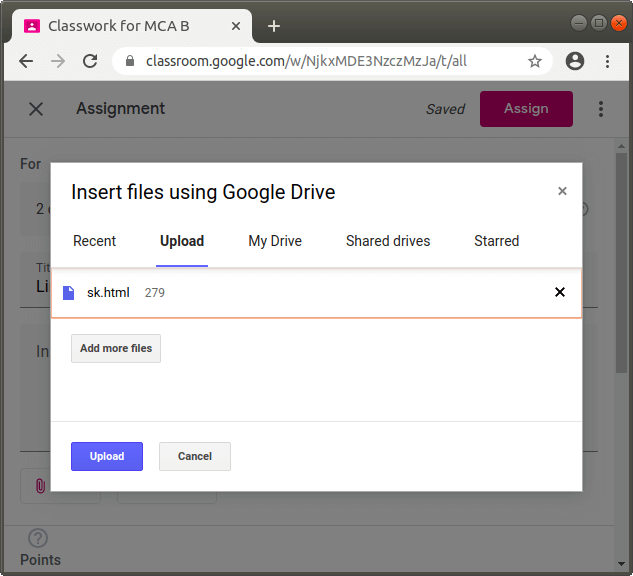
Add a file from your Google DriveFollow the given steps for adding the file in your assignment from the Google drive: Step i): Click on the +add button. Then click on the Drive option in the drop-down list. 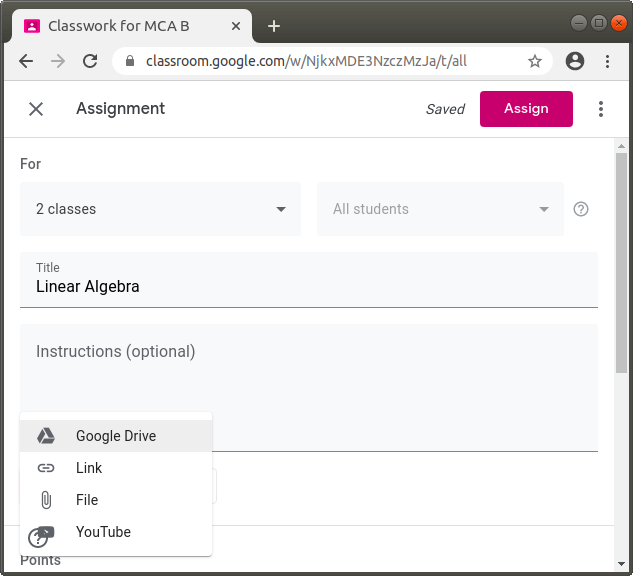
Step ii): After selecting the item from Google drive, click on Add button for adding the file. 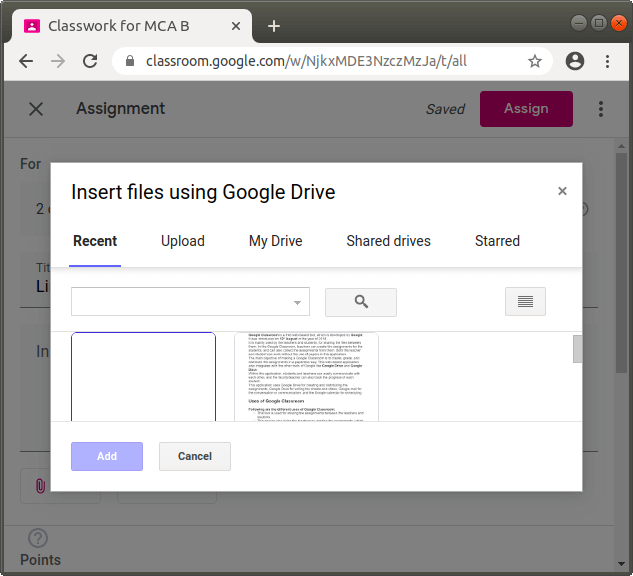
Add a LinkFollow the given steps for adding the link in your assignment: Step i): Click on the +add button. Then click on the Link option in the drop-down list. 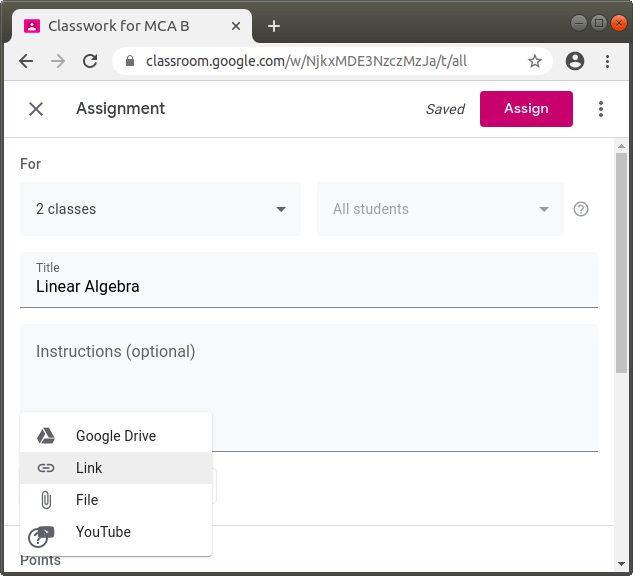
Step ii): Now, type the URL, and then click on the Add Link button. After clicking, the link is successfully added to your assignment. 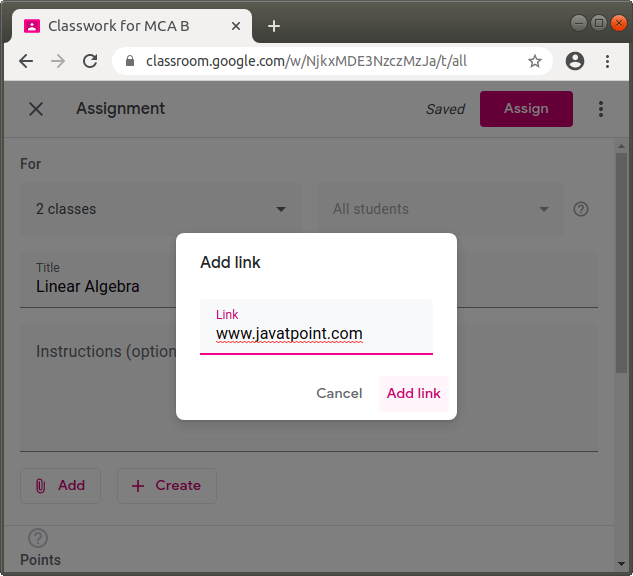
Add a YouTube VideoFollow the given steps for adding the YouTube video in your assignment: Step i): Click the +add button. Then click on the YouTube option in the drop-down list. 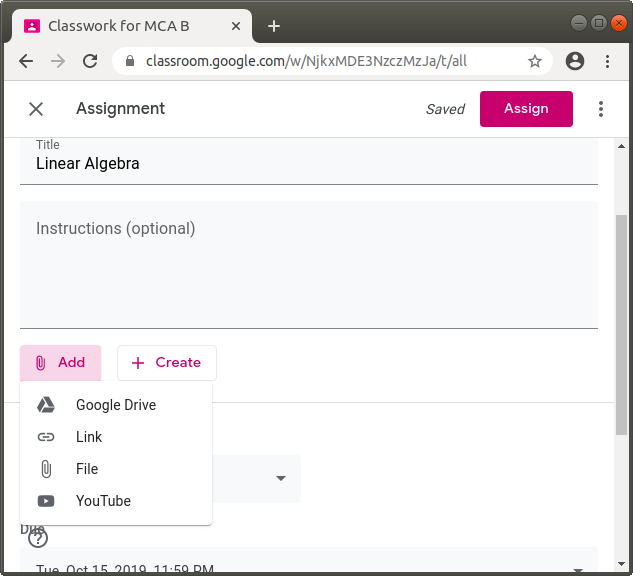
Step ii): Type the name of the video in the search bar, and click the search button. 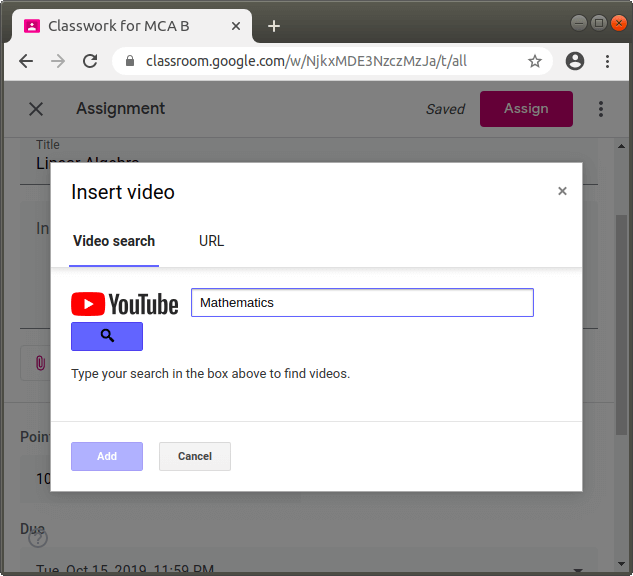
Step iii): After searching, click on the video which you want to attach, and then click on the Add button. 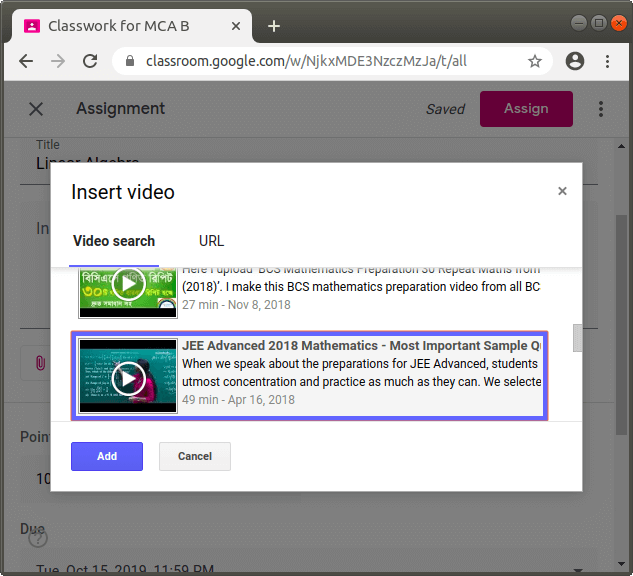
Step 12: In this step, you have to click on the Create button. And, then choose the option according to your needs. When you created an assignment successfully, click on the Assign button, which is located at the top-right corner of the screen. 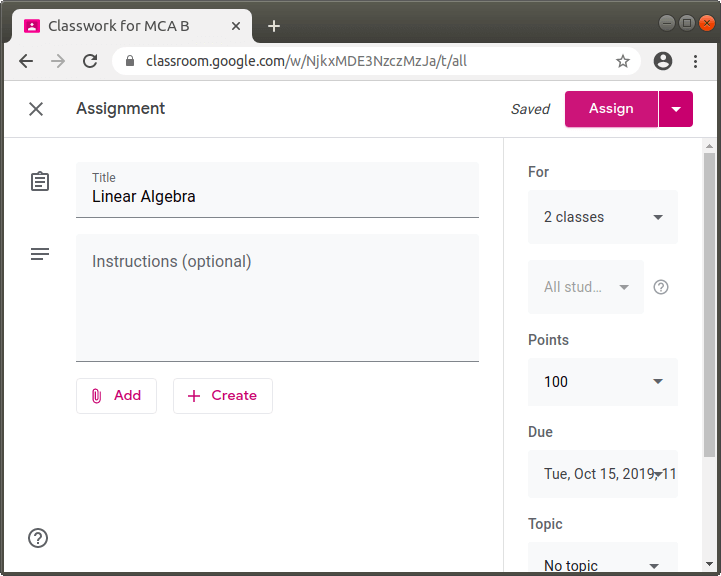
After all the steps, the assignment is posted to the students classroom, and each student who is selected, receives the notification in the E-mail of an assignment. And, the assignment is shown on the Stream page in your Google Classroom, as shown in the following screenshot: 
Delete an AssignmentIf you are a teacher and you want to delete the assignments form the class of Google Classroom, then you have to follow the steps which are given below. When any assignment is deleted from the class, all the comments and grades related to the assignment are automatically deleted. Step 1: Firstly, sign in the Google Classroom with your Google classroom id. Step 2: Then, click on the Classes tab in the classroom menu, which is located at the top right corner in the Google Classroom screen. Step 3: Now, click on that class from which you want to delete the existing assignment or assignments. 
Step 4: After that click on the Classwork tab. And, then click on the More button. 
Step 5: Select and click the Delete option in the drop-down list. 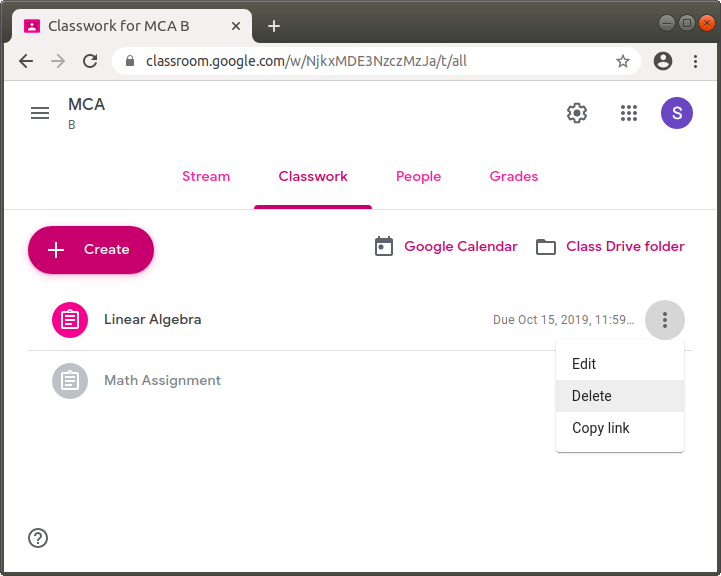
Step 6: And, again click on the Delete button to confirm. And, then your assignment is successfully deleted from your class. 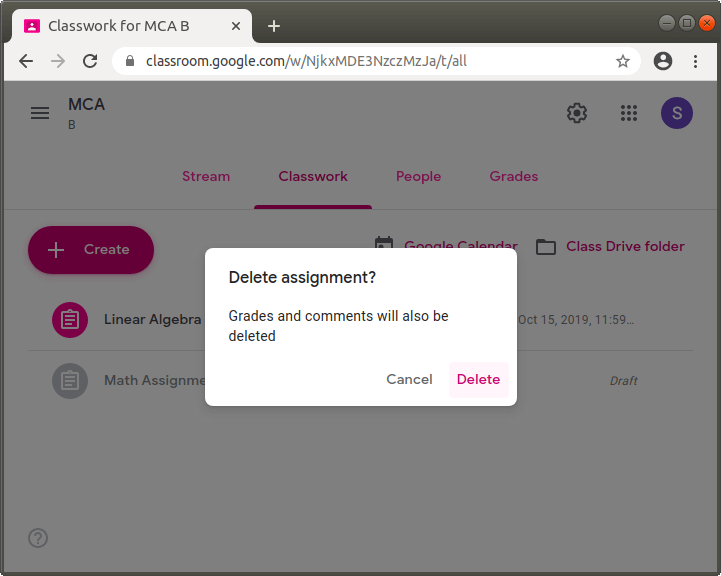
Post an AnnouncementIf you are a teacher and you want to post the announcements to the students in a class of Google Classroom, then you have to learn this section. You can easily post an announcement with various following functions:
To post an announcement to the students in a Google Classroom, follow the steps which are given below: Step 1: Firstly, sign in the Google Classroom with your Google classroom id. Step 2: Then, click on the Classes tab in the classroom menu, which is located at the top right corner in the Google Classroom screen. Step 3: Now, click on that class in which you want to post the announcement to the students. 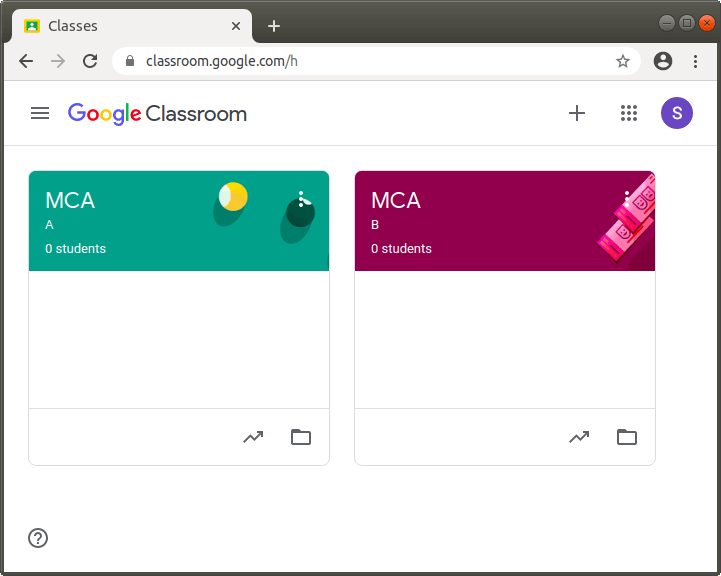
Step 4: Click Share something with your class on the stream's page, as shown in the following screenshot. 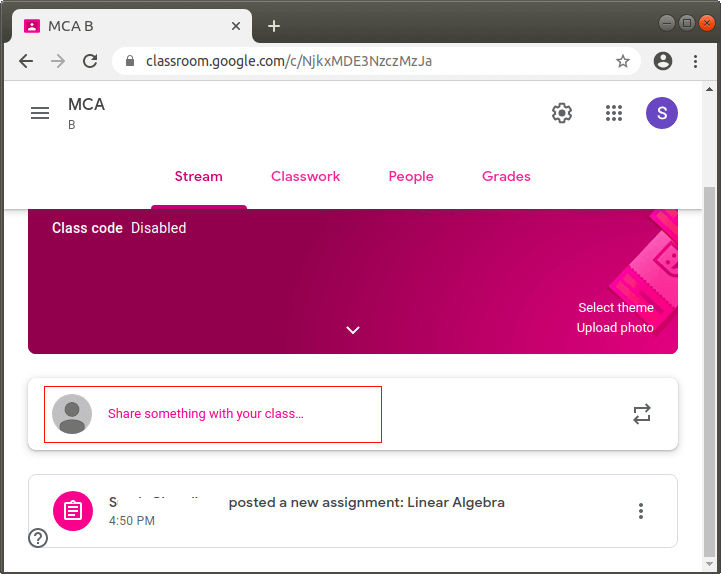
Step 5: After that, type the announcement in the box, and then click on the Post button. 
Step 6: After clicking, the announcement is posted. 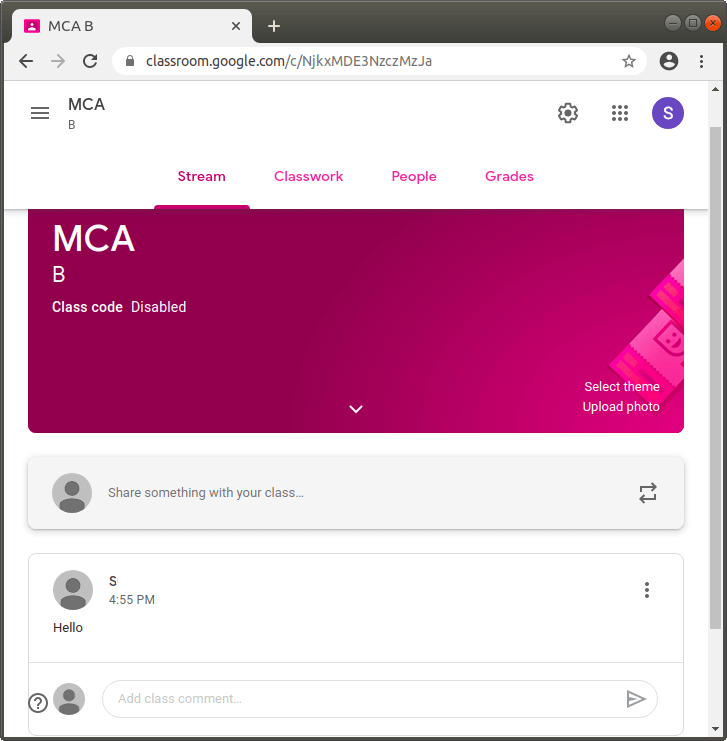
Advantages of Google ClassroomFollowing are the various benefits or advantages of the Google Classroom:
Disadvantages of Google ClassroomFollowing are the limitations or disadvantages of the Google Classroom:
|
 For Videos Join Our Youtube Channel: Join Now
Feedback
- Send your Feedback to [email protected]
Help Others, Please Share


Javatpoint Services
JavaTpoint offers too many high quality services. Mail us on [email protected], to get more information about given services.
- Website Designing
- Website Development
- Java Development
- PHP Development
- WordPress
- Graphic Designing
- Logo
- Digital Marketing
- On Page and Off Page SEO
- PPC
- Content Development
- Corporate Training
- Classroom and Online Training
- Data Entry
Training For College Campus
JavaTpoint offers college campus training on Core Java, Advance Java, .Net, Android, Hadoop, PHP, Web Technology and Python. Please mail your requirement at [email protected]
Duration: 1 week to 2 week


