| |

Jupyter Notebook Tutorial
Jupyter Notebook tutorial provides basic and advanced concepts of the Jupyter Notebook. Our Jupyter Notebook tutorial is designed for beginners and professionals. What is Jupyter Notebook?Jupyter Notebook is an open-source, web-based interactive environment, which allows you to create and share documents that contain live code, mathematical equations, graphics, maps, plots, visualizations, and narrative text. It integrates with many programming languages like Python, PHP, R, C#, etc. Note: Jupyter Notebook mainly used for Python because Python is used with Artificial Intelligence (AI), Machine learning, as well as Deep learning.In this tutorial, we are going to discuss the following topics:
Advantages of Jupyter NotebookThere are the following advantages of Jupyter Notebook -
Disadvantages of Jupyter NotebookThere are the following disadvantages of Jupyter Notebook:
Installation of Jupyter Notebook using pip packageTo install the Jupyter Notebook, first, you need to install the Python. You can follow the below steps to download the Python. Step1: Click on the link https://www.python.org/downloads/windows/ to download the latest version of the Python. 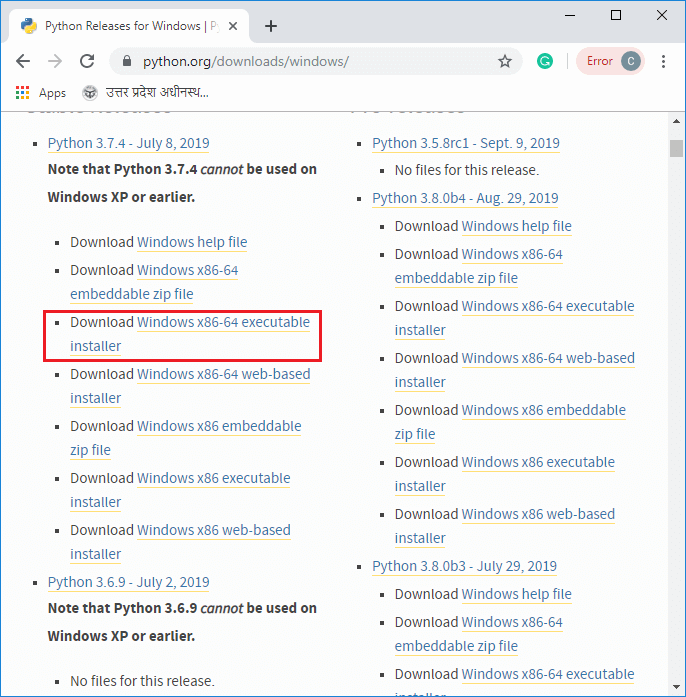
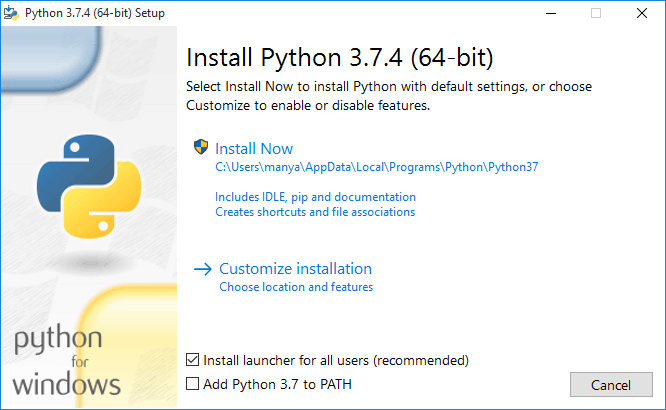
Step2: Now, double click on the downloaded file, the following window is opened. Select Install Now to Install Python.
Step3: You can see that installation is in process. 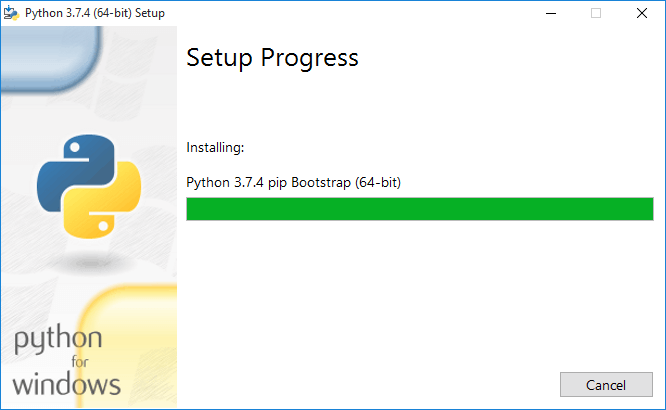
Step4: Once the installation is completed, the following window is open, you simply click on the close. 
Once the Python installation is completed, follow the below steps to install the Jupyter Notebook with pip package. Step1: Open the command prompt. Step2: Copy/ set the path, where the Python script is presented. For Example: Note: If AppData is not visible, then go to View -> Options, select change folder, and search options. After clicking on the select change folder, click on the view, and select show hidden files, folders, and drives then click on the Apply -> OK.Step3: To upgrade the older version of pip, give the following command after the specified path: Step4: To install the Jupyter Notebook, type the below command: It takes a few seconds to install the Jupyter Notebook. Step5: Once the installation process is completed, you can run your notebook on the server using the following command in command prompt. After a few seconds, Jupyter notebook starts with the default web browser which shows the list of all python files. 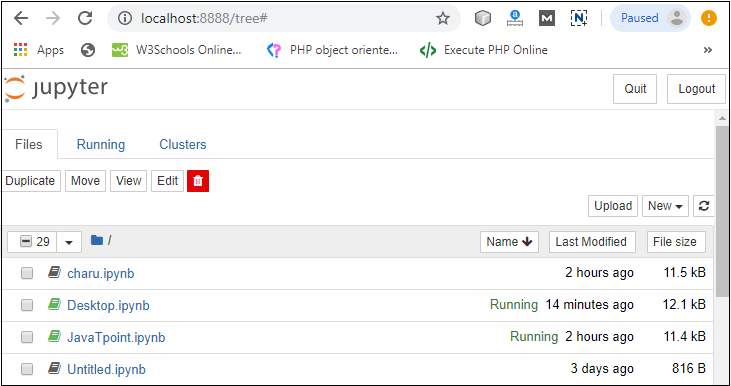
Dashboard of Jupyter NotebookThe below screenshot shows dashboard of the Jupyter Notebook which contains the three tabs. 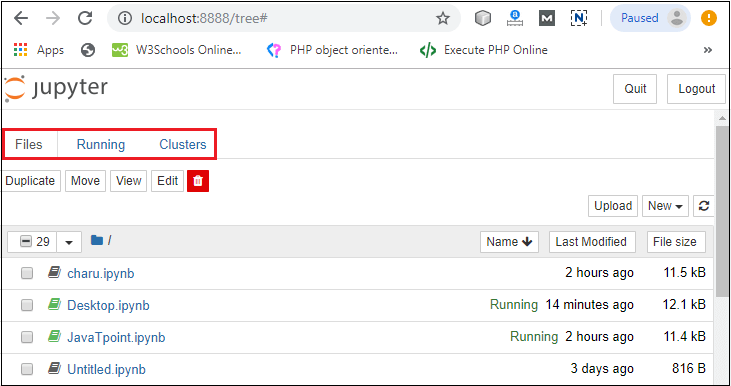
Files TabThe Files tab is used to display files and folders in the current directory. It also uses an Upload button through which a file can be uploaded to a notebook server. 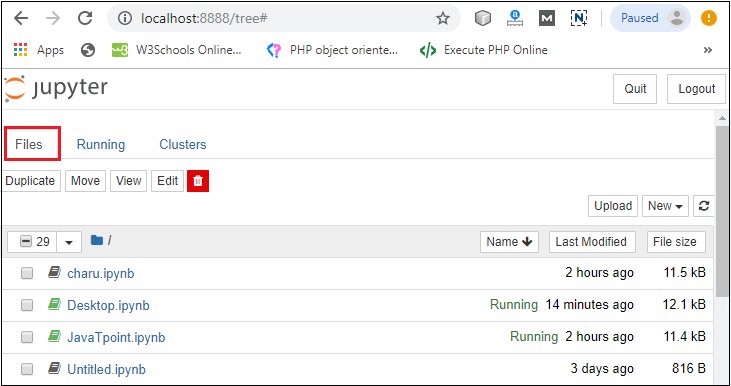
Running TabThe Running tab is used to show currently running notebooks. 
Cluster TabIPython provides the Cluster Tab. IPython is a parallel computing framework, which is an extended version of the IPython kernel. 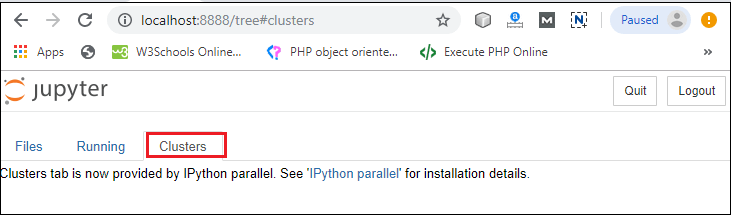
User interface of Jupyter NotebookWhen you create a new notebook, the notebook will be presented with the notebook name, menu bar, toolbar, and an empty code cell. 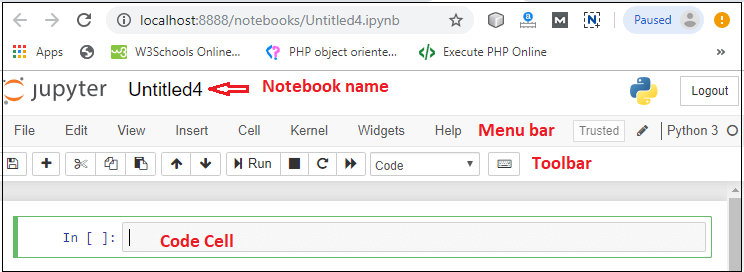
Notebook name: Notebook name is displayed at the top of the page, next to the Jupyter logo. Menu bar: The menu bar presents different options that are used to manipulate the notebook functions. Toolbar: The toolbar provides a quick way for performing the most-used operations within the notebook. Code cell: A code cell allows you to edit and write a new code. Components of Jupyter NotebookThere are the following three components of Jupyter Notebook - 1. The notebook web application: It is an interactive web application for writing and running the code. The notebook web application allows users to:
2. Kernels: Kernels are the separate processes started by the notebook web application that is used to run a user's code in the given language and return output to the notebook web application. In Jupyter notebook kernel is available in the following languages:
3. Notebook documents: Notebook document contains a representation of all content which is visible in the notebook web application, including inputs and outputs of the computations, text, mathematical equations, graphs, and images. Creating a NotebookTo create a Notebook in Jupyter, go to New and select Python3. 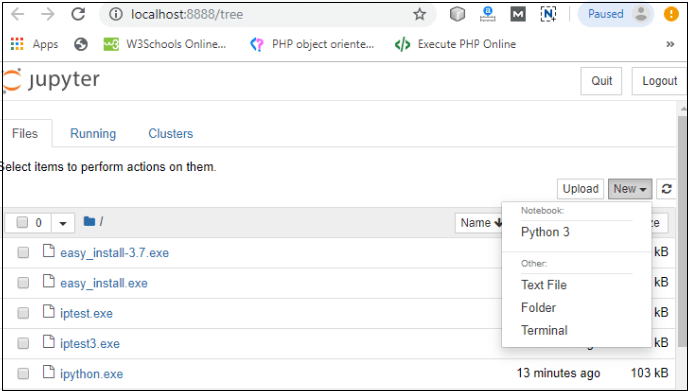
Now, you can see that a new notebook opens in a new tab. 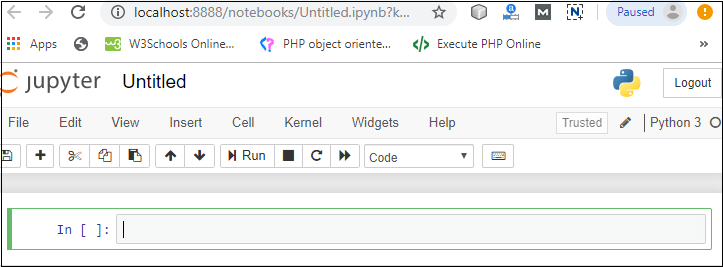
Rename the NotebookTo rename the Notebook, double click on the Untitled at the top of the screen. A pop up window will open to renaming the file. Enter a new notebook name that you want to add. Then click on the Rename. 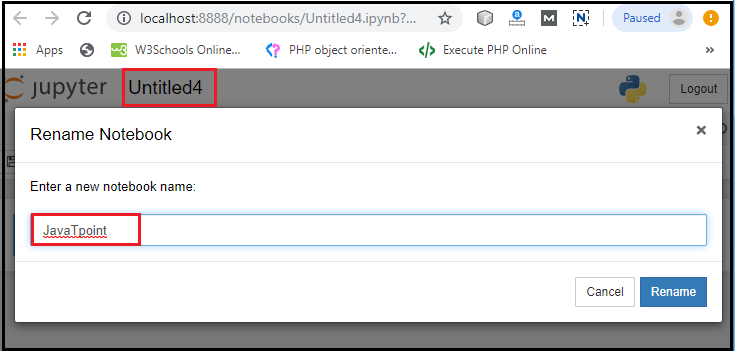
How to write and run a program in JupyterAfter renaming the file, click on the first cell in the notebook to enter in the edit mode. Now you can write the code in working area. After writing the code, you can run it by pressing the Shift+ Enter key or directly click on the run button at the top of the screen. 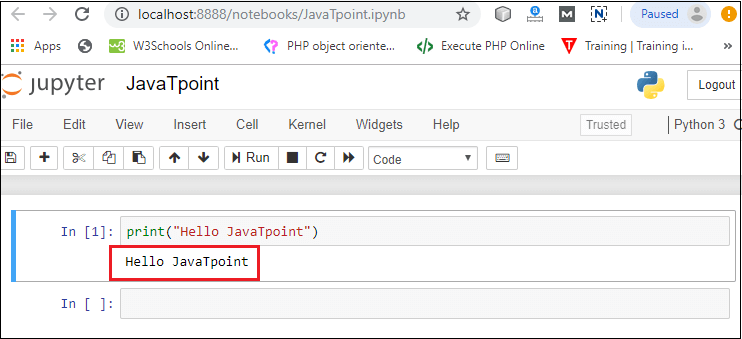
Types of cells in Jupyter NotebookThere are the following four types of cells used in the Jupyter Notebook. 
1. Code CellThe contents present in a code cell is treated as statements in a programming language of the current kernel. By default, Jupyter notebook's kernel is in Python so you can write Python statements in a code cell. When you run the statement, its output is displayed below the code. Output can be presented in the form of text, image, matplotlib plots, or HTML tables. 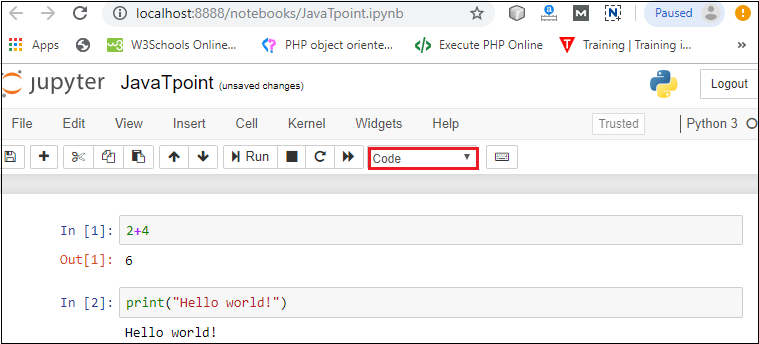
2. Markdown CellMarkdown cell provides documentation to the notebook and makes the notebook more attractive. This cell contains all types of formatting features such as making text bold and italic, headers, displaying ordered or unordered list, Bullet lists, Hyperlinks, tabular contents, images, etc. To perform the following formatting features, first select Markdown cell from the drop-down menu. 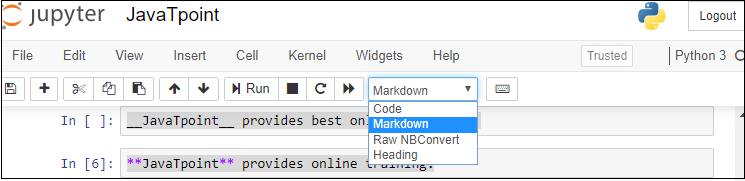
Bold and Italics

The following screenshot shows the output of the above code. 

The following screenshot shows the output of the above code. 
HeadersCreating headers in Markdown is quite similar to the creating headers in HTML. It displays text in 6 sizes. To make the text as a header, start the text using # symbol. The number of # symbols depends upon the size of the header. For example - Header 1 use one # symbol, header 2 use two # symbol, and so on. 
The following screenshot shows the output of the above Header cells. 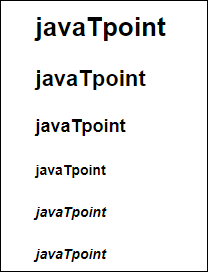
Ordered ListsThe ordered list starts with 1. Use tab to make the suborder followed by the order. 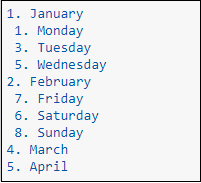
The following screenshot shows the output of the above Markdown data. 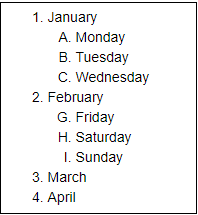
Bullet listsIn Jupyter notebook, if text starts with the dash (-) symbol, markdown cell coverts dash into a solid circle and asterisk (*) to a solid square. 
The following screenshot shows the output of the above Markdown data. 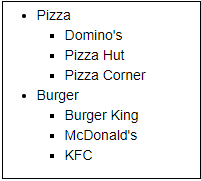
HyperlinksMarkdown cell allows you to attach the Hyperlink. To attach the hyperlink place the name of the link in square brackets [] and write link inside the parentheses (). You can use the following code to insert the hyperlink. 
Output: 
Table ContentMarkdown cell allows you to create a table using pipe symbol (|) and dash symbol (-). Pipe symbol (|) is used for making columns, and dash symbol (-) is used for making the rows. The table creation is shown below: 
The following screenshot shows the table content of markdown cell. 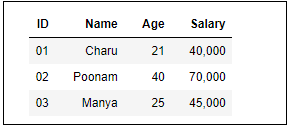
ImagesTo insert the image in a markdown cell, you first need to insert the image in the same directory. For this, go to Jupyter dashboard -> select Upload, specify the path of an image then click on Open. 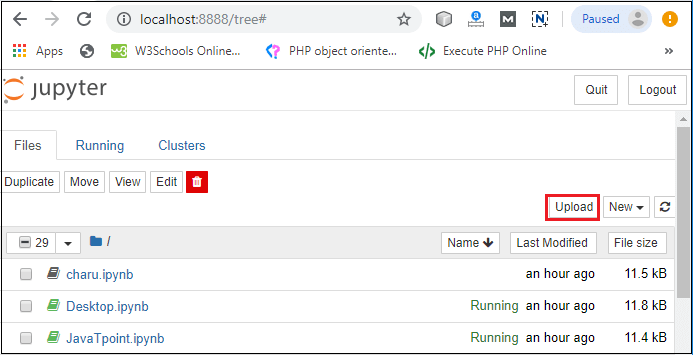
Once the image is seen in the dashboard click on the Upload, you can see that image is uploaded in the dashboard. 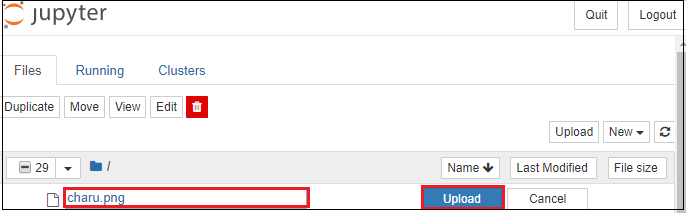
Now, go to your current Notebook, and type the following code to insert the image. 
The following screenshot shows that the image is inserted on the Notebook. 
3. Raw NBConvert CellRaw NBConvert Cell provides a place where you can write output directly. These cells are not evaluated by the notebook kernel. 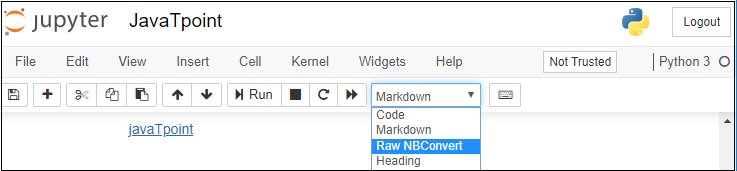
4. Heading CellThe Jupyter Notebook does not support the heading cell. When you select the Heading from the drop-down menu, a pop will open on the screen which is shown in the below screenshot. 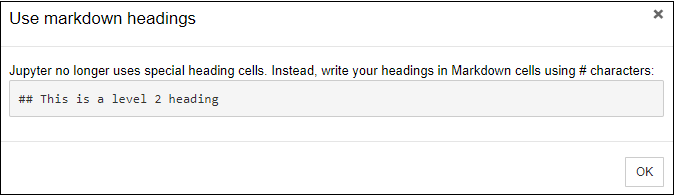
IPyWidgets in the Jupyter NotebookThe ipywidgets provides many common user interfaces for exploring code and data interactively. By default, ipywidgets are installed in Anaconda or you can also install it manually with conda. Some example of ipywidges are given below: 1. Text widgetThe text widget allows the user to write the String: Output: 
2. Button widgetThe button widget is similar to the HTML button. To create button, type the following code. Output: 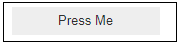
3. color pickerThe Color picker allows you to select a color as per to your requirement.Output: 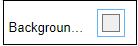
When you click on the square box, the following pop up will open. 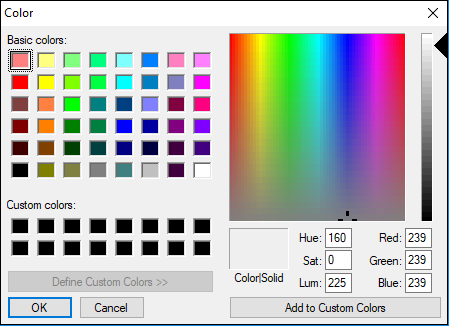
4. SliderSider is used to find the range and interval between two entities. Output: 
Example: Write a code to add two numbers. Output: 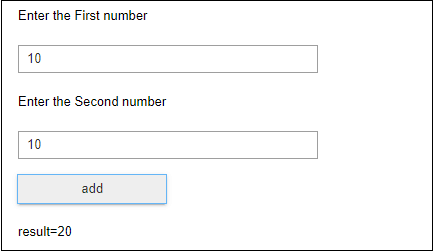
PrerequisiteBefore learning Jupyter Notebook, you must have the basic knowledge of HTML, CSS, and JavaScript. AudienceOur Jupyter Notebook tutorial is designed to help beginners. ProblemWe assure that you will not find any problem in this Jupyter Notebook tutorial. But if there is any mistake or error, please post the error in the contact form. |
 For Videos Join Our Youtube Channel: Join Now
Feedback
- Send your Feedback to [email protected]
Help Others, Please Share


Javatpoint Services
JavaTpoint offers too many high quality services. Mail us on [email protected], to get more information about given services.
- Website Designing
- Website Development
- Java Development
- PHP Development
- WordPress
- Graphic Designing
- Logo
- Digital Marketing
- On Page and Off Page SEO
- PPC
- Content Development
- Corporate Training
- Classroom and Online Training
- Data Entry
Training For College Campus
JavaTpoint offers college campus training on Core Java, Advance Java, .Net, Android, Hadoop, PHP, Web Technology and Python. Please mail your requirement at [email protected]
Duration: 1 week to 2 week


