| |

Arduino IDEThe Arduino IDE is an open-source software, which is used to write and upload code to the Arduino boards. The IDE application is suitable for different operating systems such as Windows, Mac OS X, and Linux. It supports the programming languages C and C++. Here, IDE stands for Integrated Development Environment. The program or code written in the Arduino IDE is often called as sketching. We need to connect the Genuino and Arduino board with the IDE to upload the sketch written in the Arduino IDE software. The sketch is saved with the extension '.ino.' The Arduino IDE will appear as: 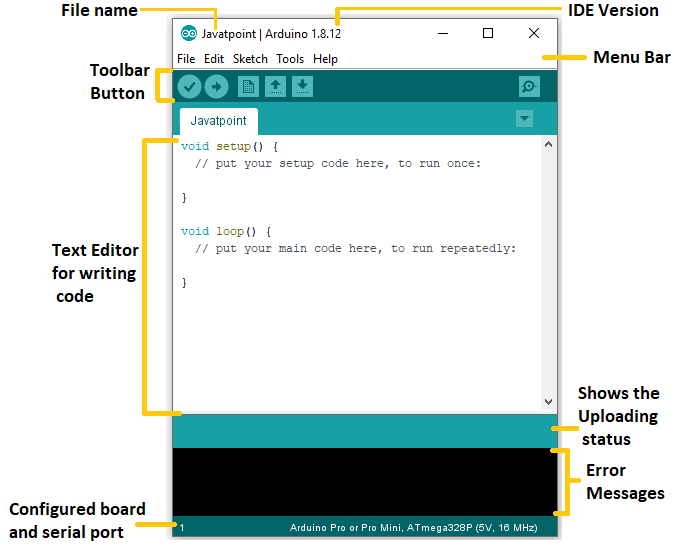
Let's discuss each section of the Arduino IDE display in detail. Toolbar ButtonThe icons displayed on the toolbar are New, Open, Save, Upload, and Verify. It is shown below: 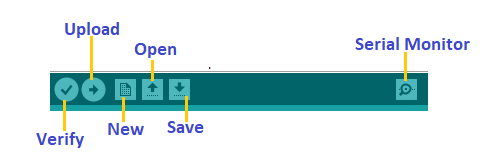
UploadThe Upload button compiles and runs our code written on the screen. It further uploads the code to the connected board. Before uploading the sketch, we need to make sure that the correct board and ports are selected. We also need a USB connection to connect the board and the computer. Once all the above measures are done, click on the Upload button present on the toolbar. The latest Arduino boards can be reset automatically before beginning with Upload. In the older boards, we need to press the Reset button present on it. As soon as the uploading is done successfully, we can notice the blink of the Tx and Rx LED. If the uploading is failed, it will display the message in the error window. We do not require any additional hardware to upload our sketch using the Arduino Bootloader. A Bootloader is defined as a small program, which is loaded in the microcontroller present on the board. The LED will blink on PIN 13. OpenThe Open button is used to open the already created file. The selected file will be opened in the current window. SaveThe save button is used to save the current sketch or code. NewIt is used to create a new sketch or opens a new window. VerifyThe Verify button is used to check the compilation error of the sketch or the written code. Serial MonitorThe serial monitor button is present on the right corner of the toolbar. It opens the serial monitor. It is shown below: 
When we connect the serial monitor, the board will reset on the operating system Windows, Linux, and Mac OS X. If we want to process the control characters in our sketch, we need to use an external terminal program. The terminal program should be connected to the COM port, which will be assigned when we connect the board to the computer. Menu Bar
When we click on the File button on the Menu bar, a drop-down list will appear. It is shown below: 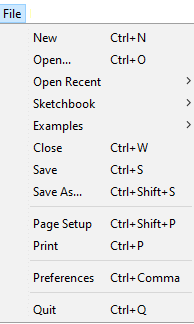
Let's discuss each option in detail. New The New button opens the new window. It does not remove the sketch which is already present. Open It allows opening the sketch, which can be browsed from the folders and computer drivers. Open Recent The Open Recent button contains the list of the recent sketches. Sketchbook It stores the current sketches created in the Arduino IDE software. It opens the selected sketch or code in a new editor at an instance. Examples It shows the different examples of small projects for a better understanding of the IDE and the board. The IDE provides examples of self-practice. Close The Close button closes the window from which the button is clicked. Save The save button is used to save the current sketch. It also saves the changes made to the current sketch. If we have not specified the name of the file, it will open the 'Save As...' window. Save As... We can save the sketch with a different name using the 'Save As...' button. We can also change the name accordingly. Page Setup It allows setting the page margins, orientation, and size for printing. The 'Page Setup' window will appear as: 
According to the settings specified in the 'Page Setup', it prepares the current sketch for printing. Preferences It allows the customization settings of the Arduino IDE. Quit The Quit button is used to close all the IDE windows. The same closed sketch will be reopened when we will open the Arduino IDE.
When we click on the Edit button on the Menu bar, a drop-down list appears. It is shown below: 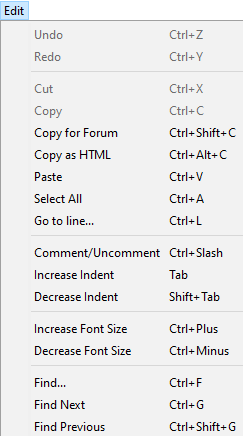
Let's discuss each option in detail. Undo The Undo button is used to reverse the last modification done to the sketch while editing. Redo The Redo button is used to repeat the last modification done to the sketch while editing. Cut It allows us to remove the selected text from the written code. The text is further placed to the clipboard. We can also paste that text anywhere in our sketch. Copy It creates a duplicate copy of the selected text. The text is further placed on the clipboard. Copy for Forum The 'Copy for Forum' button is used to copy the selected text to the clipboard, which is also suitable for posting to the forum. Copy as HTML The 'Copy for Forum' button is used to copy the selected text as HTML to the clipboard. It is desirable for embedding in web pages. Paste The Paste button is used to paste the selected text of the clipboard to the specified position of the cursor. Select All It selects all the text of the sketch. Go to line... It moves the cursor to the specified line number. The window will appear as: 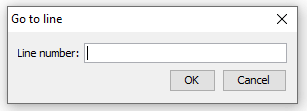
Comment/Decomment The Comment/ Decomment button is used to put or remove the comment mark (//) at the beginning of the specified line. Increase Indent It is used to add the space at the starting of the specified line. The spacing moves the text towards the right. Decrease Indent It is used to subtract or remove the space at the starting of the specified line. The spacing moves the text towards the left. Increase Font Size It increases the font size of the written text. Decrease Font Size It decreases the font size of the written text. Find... It is used to find the specified text. We can also replace the text. It highlights the text in the sketch. The window will appear as: 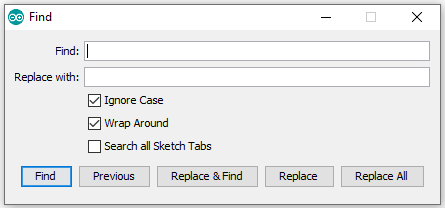
Find Next It highlights the next word, which has specified in the 'Find...' window. If there is no such word, it will not show any highlighted text. Find Previous It highlights the previous word, which has specified in the 'Find...' window. If there is no such word, it will not show any highlighted text.
When we click on the Sketch button on the Menu bar, a drop-down list appears. It is shown below: 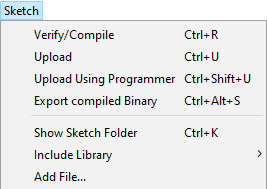
Let's discuss each option in detail. Verify/Compile It will check for the errors in the code while compiling. The memory in the console area is also reported by the IDE. Upload The Upload button is used to configure the code to the specified board through the port. Upload Using Programmer It is used to override the Bootloader that is present on the board. We can utilize the full capacity of the Flash memory using the 'Upload Using Programmer' option. To implement this, we need to restore the Bootloader using the Tools-> Burn Bootloader option to upload it to the USB serial port. Export compiled Binary It allows saving a .hex file and can be kept archived. Using other tools, .hex file can also be sent to the board. Show Sketch Folder It opens the folder of the current code written or sketch. Include Library Include Library includes various Arduino libraries. The libraries are inserted into our code at the beginning of the code starting with the #. We can also import the libraries from .zip file. Add File... The Add File... button is used to add the created file in a new tab on the existing file. For example, let's add 'Blink' file to the 'Javatpoint' file. The tab will now appear as: 
We can also delete the corresponding file from the tab by clicking on the small triangle -> Delete option. ToolsWhen we click on the Tools button on the Menu bar, a drop-down list appears. It is shown below: 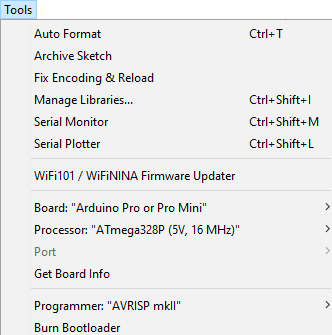
Let's discuss each option in detail. Auto Format The Auto Format button is used to format the written code. For example, lining the open and closed curly brackets in the code. Archive Sketch The copy of the current sketch or code is archived in the .zip format. The directory of the archived is same as the sketch. Fix Encoding and Reload This button is used to fix the inconsistency between the operating system char maps and editor char map encoding. Manage Libraries... It shows the updated list of all the installed libraries. We can also use this option to install a new library into the Arduino IDE. Serial Monitor It allows the exchange of data with the connected board on the port. Serial Plotter The Serial Plotter button is used to display the serial data in a plot. It comes preinstalled in the Arduino IDE. WiFi101/WiFiNINA Firmware Updater It is used to check and update the Wi-Fi Firmware of the connected board. Board We are required to select the board from the list of boards. The selected board must be similar to the board connected to the computer. Processor It displays the processor according to the selected board. It refreshes every time during the selection of the board. Port It consists of the virtual and real serial devices present on our machine. Get Board Info It gives the information about the selected board. We need to select the appropriate port before getting information about the board. Programmer We need to select the hardware programmer while programming the board. It is required when we are not using the onboard USB serial connection. It is also required during the burning of the Bootloader. Burn Bootloader The Bootloader is present on the board onto the microcontroller. The option is useful when we have purchased the microcontroller without the bootloader. Before burning the bootloader, we need to make sure about the correct selected board and port. HelpWhen we click on the Help button on the Menu bar, a drop-down list will appear. It is shown below: 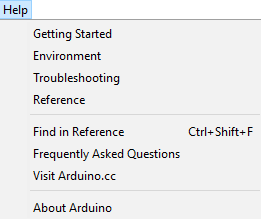
The Help section includes several documents that are easy to access, which comes along with the Arduino IDE. It consists of the number of options such as Getting Started, Environment, Troubleshooting, Reference, etc. We can also consider the image shown above, which includes all the options under the Help section. Some documents like Getting started, Reference, etc., can be accessed without the internet connection as well. It will directly link us to the official website of Arduino.
Next TopicArduino Kit
|
 For Videos Join Our Youtube Channel: Join Now
Feedback
- Send your Feedback to [email protected]
Help Others, Please Share


Javatpoint Services
JavaTpoint offers too many high quality services. Mail us on [email protected], to get more information about given services.
- Website Designing
- Website Development
- Java Development
- PHP Development
- WordPress
- Graphic Designing
- Logo
- Digital Marketing
- On Page and Off Page SEO
- PPC
- Content Development
- Corporate Training
- Classroom and Online Training
- Data Entry
Training For College Campus
JavaTpoint offers college campus training on Core Java, Advance Java, .Net, Android, Hadoop, PHP, Web Technology and Python. Please mail your requirement at [email protected]
Duration: 1 week to 2 week


