| |

Arduino UNOThe Arduino UNO is a standard board of Arduino. Here UNO means 'one' in Italian. It was named as UNO to label the first release of Arduino Software. It was also the first USB board released by Arduino. It is considered as the powerful board used in various projects. Arduino.cc developed the Arduino UNO board. Arduino UNO is based on an ATmega328P microcontroller. It is easy to use compared to other boards, such as the Arduino Mega board, etc. The board consists of digital and analog Input/Output pins (I/O), shields, and other circuits. The Arduino UNO includes 6 analog pin inputs, 14 digital pins, a USB connector, a power jack, and an ICSP (In-Circuit Serial Programming) header. It is programmed based on IDE, which stands for Integrated Development Environment. It can run on both online and offline platforms. The IDE is common to all available boards of Arduino. The Arduino board is shown below: 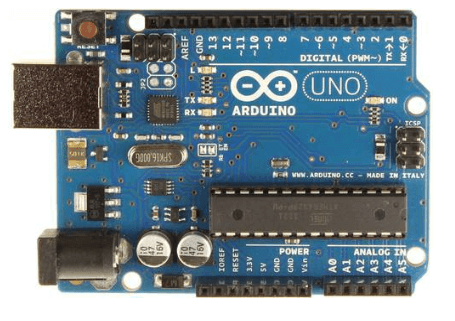
The components of Arduino UNO board are shown below: 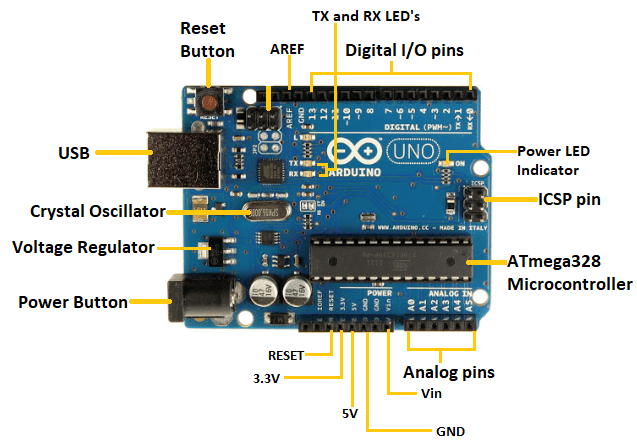
Let's discuss each component in detail.
Why is Arduino recommended over other boards for beginners?The USB port in the Arduino board is used to connect the board to the computer using the USB cable. The cable acts as a serial port and as the power supply to interface the board. Such dual functioning makes it unique to recommend and easy to use for beginners. What is the main difference between Arduino UNO and Arduino Nano?The Arduino Nano has a compact size and mini USB cable than the Arduino UNO. What is the main difference between Arduino UNO and Arduino Mega?The Arduino UNO is a standard board recommended to beginners, while Arduino Mega is used for complex projects due to its greater memory space. MemoryThe memory structure is shown in the below image: 
The preinstalled flash has a bootloader, which takes the memory of 0.5 Kb. Here, SRAM stands for Static Random Access Memory, and EEPROM stands for Electrically Erasable Programmable Read-Only Memory. Technical Specifications of Arduino UNOThe technical specifications of the Arduino UNO are listed below:
How to get started with Arduino UNO?We can program the Arduino UNO using the Arduino IDE. The Arduino IDE is the Integral Development program, which is common to all the boards. We can also use Arduino Web Editor, which allows us to upload sketches and write the code from our web browser (Google Chrome recommended) to any Arduino Board. It is an online platform. The USB connection is essential to connect the computer with the board. After the connection, the PWR pins will light in green. It is a green power LED. The steps to get started with Arduino UNO are listed below:
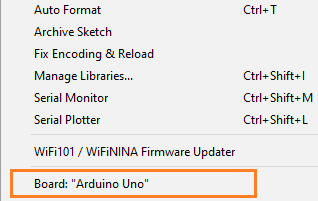
As soon we connect the board to the computer, Windows from XP to 10 will automatically install the board drivers. But, if you have expanded or downloaded the zip package, follow the below steps:
To upload and run, click on the button present on the top panel of the Arduino display, as shown below: 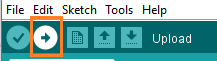
Within the few seconds after the compile and run of code or sketch, the RX and TX light present on the Arduino board will flash. The 'Done Uploading' message will appear after the code is successfully uploaded. The message will be visible in the status bar.
Next TopicArduino UNO Pinout
|
 For Videos Join Our Youtube Channel: Join Now
Feedback
- Send your Feedback to [email protected]
Help Others, Please Share


Javatpoint Services
JavaTpoint offers too many high quality services. Mail us on [email protected], to get more information about given services.
- Website Designing
- Website Development
- Java Development
- PHP Development
- WordPress
- Graphic Designing
- Logo
- Digital Marketing
- On Page and Off Page SEO
- PPC
- Content Development
- Corporate Training
- Classroom and Online Training
- Data Entry
Training For College Campus
JavaTpoint offers college campus training on Core Java, Advance Java, .Net, Android, Hadoop, PHP, Web Technology and Python. Please mail your requirement at [email protected]
Duration: 1 week to 2 week


