| |

Arc in AutoCAD

Types of ArcThe arrow below the arc consists of the drop-down list specifying the types of arcs. The list will look like the below image: 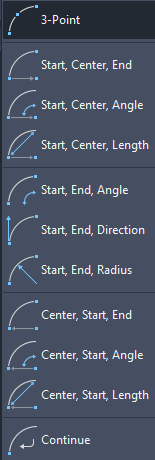
Let's discuss each type of arc with examples.
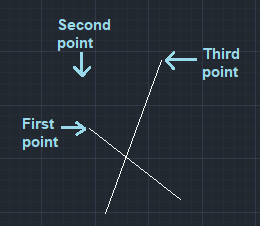
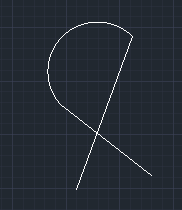
Example: To create an arc on two intersecting lines. Here, we need to specify three points to create an arc. The steps to create a 3-point arc are listed below:
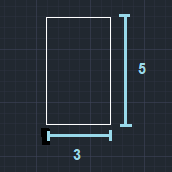
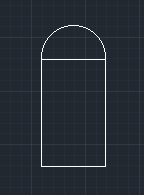
Example: Arc on a rectangle. The steps to create an arc are listed below:
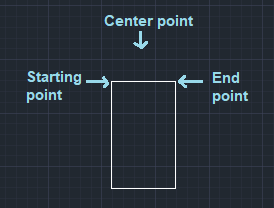
It creates an arc using the start point, center point, and an included angle. Consider the below image: 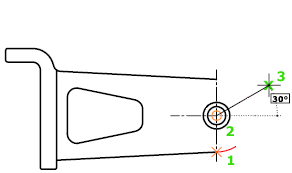
Here, 1 and 2 are the starting and center point, and 3 is the specified included angle. The radius of arc is defined as the distance between the center point and the start point. Let's understand by another example. The process is shown below: 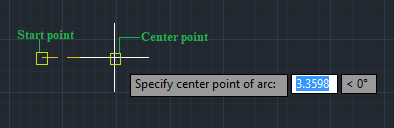
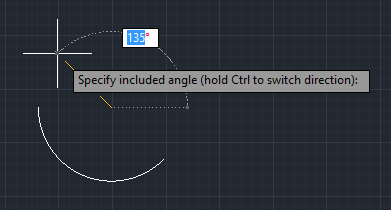
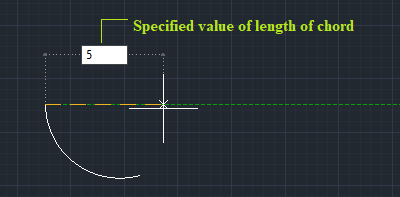
The arc will be created counter-clockwise from the start point. We need to hold the Ctrl key to switch the direction of the arc. Start, Center, LengthIt creates an arc using the start point, center point, and the length of the chord. Consider the below image: 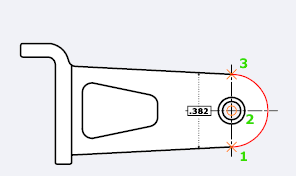
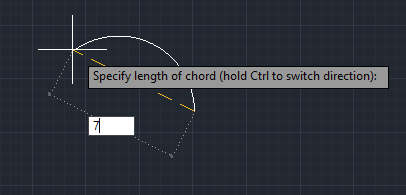
Here, 1 and 2 are the starting and center point. The distance between points 1 and 3 determines the length of the chord. The distance between the center point and the start point determines the radius. Let's understand by another example. The process is shown below: 
The created arc will be: 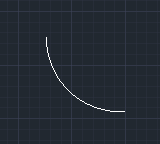
Start, End, AngleIt creates an arc using the start point, endpoint, and an included angle. Consider the below image: 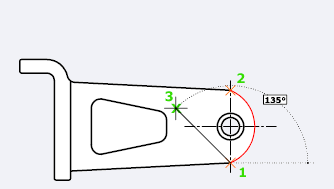
Here, 1 and 2 are the starting and endpoint, and 3 is the specified includedangle. The included angle between the center point and arc determines the radius and center of the arc. Let's understand by another example. The process is shown below: 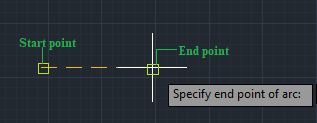
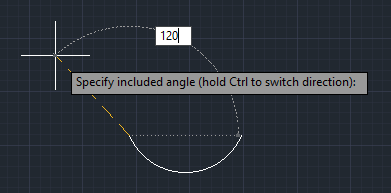
Here, we have specified the included angle of 120. The created arc is shown below: 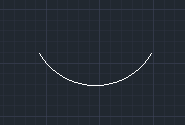
Start, End, DirectionIt creates an arc using the start point, end point, and a tangent direction at the start point. Let's understand by example. The process is shown below: 
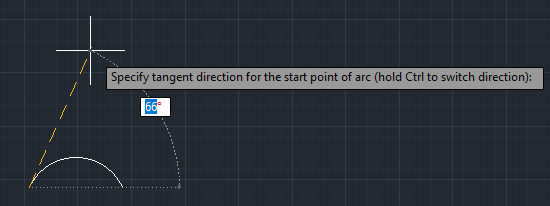
We can specify the direction of the tangent either by a point on the desired tangent line or by specifying the angle value. We can also change the order of the endpoints. Start, End, RadiusIt creates an arc using the start point, end point, and a radius. Let's understand by example. The process is shown below: 
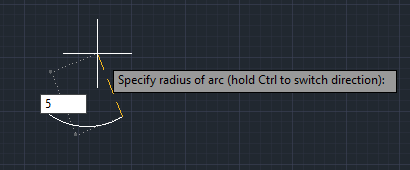
Here, we have specified the radius value 5. The created arc is shown below: 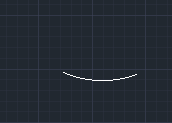
The direction is determined by order of the endpoints. We can specify the radius by entering the radius value. We can also determine it by specifying the point at the desired distance. Center, Start, EndIt creates an arc using center point, start point, and the endpoint. The endpoint can also be determined as the third point. Let's understand with an example. The process is shown below: 
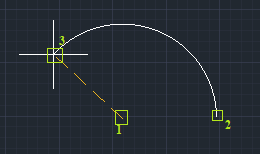
Here, 1 and 2 are the center point and thestart point. 3 is the third point or endpoint. The radius of arc is defined as the distance between the center point and the start point. The arc is created in an anti-clockwise direction. To switch the direction, we need to press the Ctrl button. Center, Start, AngleIt creates an arc using center point, start point, and the included angle. Let's understand with an example. The process is shown below: 
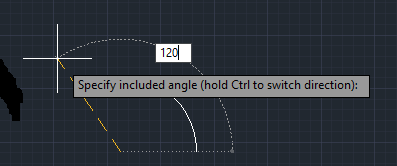
Here, we have specified the included angle= 120. The created arc is shown below: 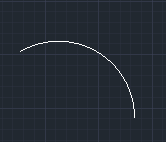
The radius of arc is defined as the distance between the center point and the start point. The arc is created in an anti-clockwise direction. To switch the direction, we need to press the Ctrl button. Center, Start, LengthIt creates an arc using center point, start point, and length of the chord. Let's understand with an example. The process is shown below: 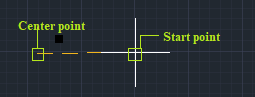
Here, we have specified the length of the chord= 7. The created arc is shown below: 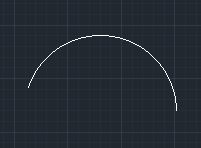
The radius of arc is defined as the distance between the center point and the start point. The arc is created in anti-clockwise direction. To switch the direction, we need to press the Ctrl button. ContinueIt creates an arc from the last line or arc drawn. Consider the below image: 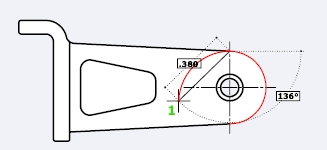
After the drawn arc or line, we can immediately create an arc that is tangent at an endpoint. We need to only specify the endpoint of the arc.
Next TopicRectangle command
|

 For Videos Join Our Youtube Channel: Join Now
Feedback
- Send your Feedback to [email protected]
Help Others, Please Share


Javatpoint Services
JavaTpoint offers too many high quality services. Mail us on [email protected], to get more information about given services.
- Website Designing
- Website Development
- Java Development
- PHP Development
- WordPress
- Graphic Designing
- Logo
- Digital Marketing
- On Page and Off Page SEO
- PPC
- Content Development
- Corporate Training
- Classroom and Online Training
- Data Entry
Training For College Campus
JavaTpoint offers college campus training on Core Java, Advance Java, .Net, Android, Hadoop, PHP, Web Technology and Python. Please mail your requirement at [email protected]
Duration: 1 week to 2 week


