| |

Mouse Controls in AutoCADThe computer mouse has an important role in AutoCAD. There are three essential parts of a mouse, namely, the left button, right button, and a scroll wheel. The image of a mouse displaying its three basic parts is shown in the given image: 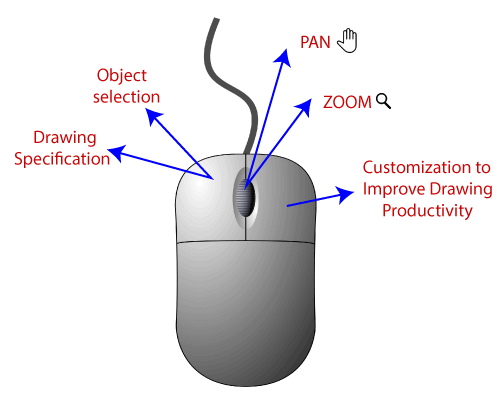
The above image displays the role of each part of a mouse. Let's discuss the role of each part in detail. Scroll ButtonThe scroll button in AutoCAD performs two functions, which are given below: 1. ZOOM When we scroll up the button, it 'zoom out' the screen. When we scroll down the button, it 'zoom in' the screen. We can also perform this task by using other commands. There are two ways to perform this task using the commands, which are discussed below: a. Right-click on the drawing screen of the AutoCAD. A box will appear as the given image: 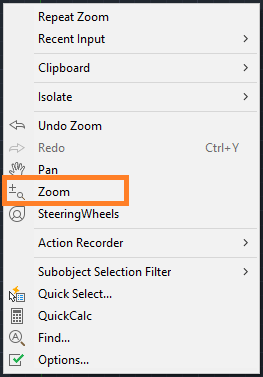
Select the Zoom option as marked in the above image. The zoom button b. The second option is to select the ZOOM option given on the navigation bar, as shown in the below image: 
Click on the small arrow below the zoom button on the navigation bar. A box will appear as shown in the below image: 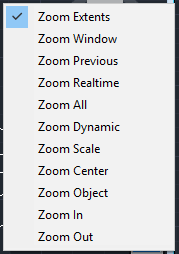
You can select any option according to the requirements. The more you click on the button, the more you zoom. 2. PAN To implement PAN using the mouse, we need to press and hold the scroll wheel and then drag. Some mouse comes with a center button allowing Panning without pressing the scroll wheel. The example of such type of mouse is CadMouse. The PAN Button on the screen will appear as the given image: 
When we select the area to PAN and drag, the symbol appears as the given image: 
We can also control the Panning through the PAN Button on the navigation bar, which will look like the below image: 
After selecting the symbol, we need to click on the area to PAN, click on the left mouse button, and drag it to a suitable area or space according to the requirements. We can also select the PAN option by right-clicking on the screen of AutoCAD. Left ButtonThe left button of a mouse in AutoCAD plays the most important role from selecting the object to the completion of a drawing. In every step of creating either 2D or 3D drawings or models, the role of the left button will be the prior option. Right ButtonThe right button of the mouse in AutoCAD is used for customization; to increase drawing productivity. The right button is also used as a shortcut menu. Let's understand with an example. When we right-click on the screen of the AutoCAD, a dialogue box opens as shown in the given image: 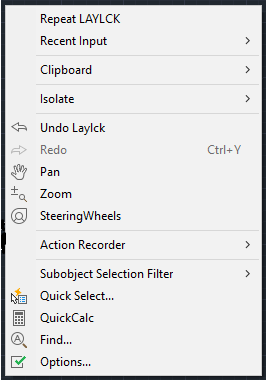
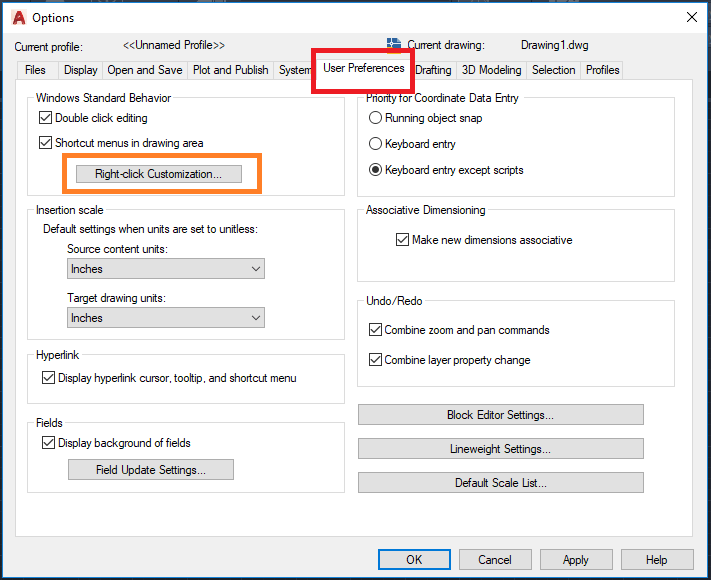
The 'Options...' is widely used in the 2D and 3D drawings or models in AutoCAD. After selecting, a dialogue box appears as shown in the below image: 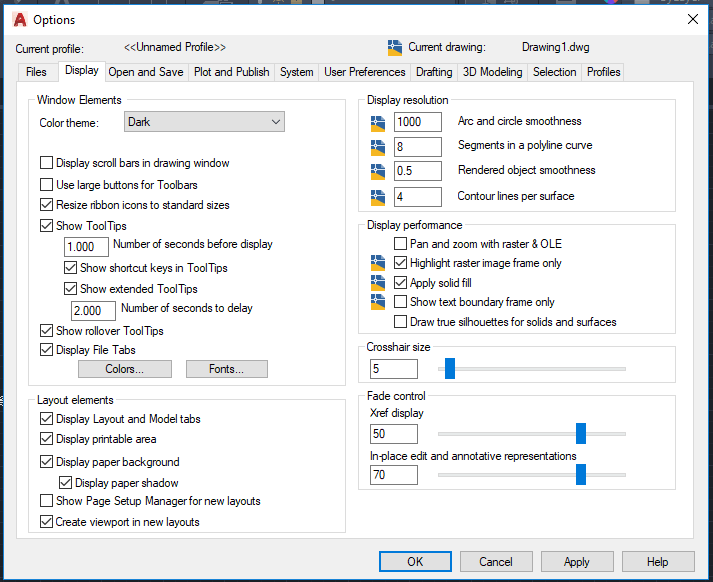
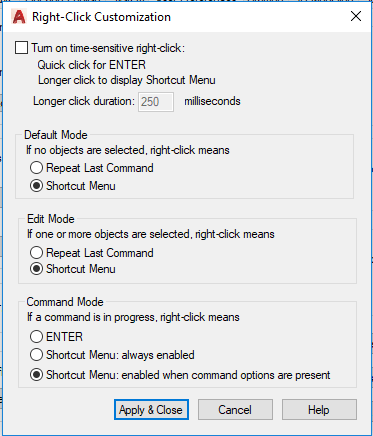
The categories under the 'Options...' display the various profiles, which will be used further for multiple purposes. The other purposes related to the right-click are discussed below: a) We can change the customization setting of Time-sensitive right-click. We can use this method to set a quick click equal to the 'Enter'. If we right-click quickly before the 250 milliseconds duration, it works equivalent to pressing Enter. If we take longer time, then it will open the shortcut menu. The steps to change such setting are listed below:
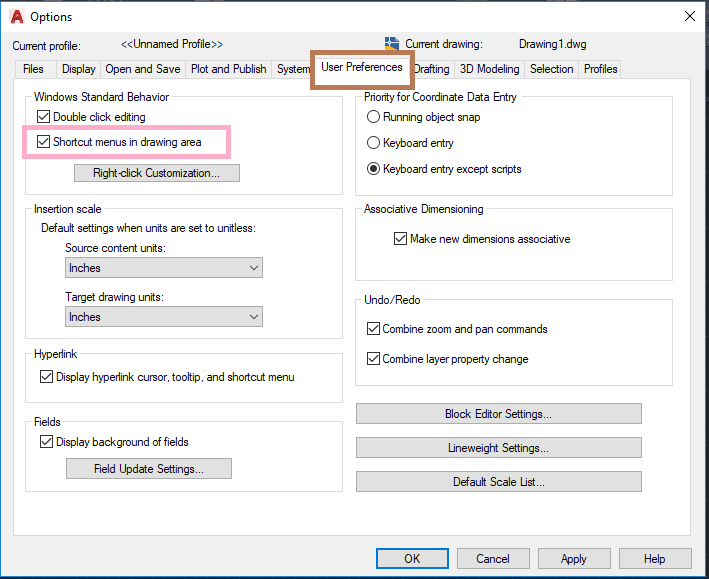
b) We can also turn off the shortcut menus in the drawing area. The steps are listed below:
Next TopicAutoCAD Selection method
|
 will appear on the screen. We need to continue press the left button of the mouse and drag up to zoom in and drag down to zoom out.
 For Videos Join Our Youtube Channel: Join Now
Feedback
- Send your Feedback to [email protected]
Help Others, Please Share


Javatpoint Services
JavaTpoint offers too many high quality services. Mail us on [email protected], to get more information about given services.
- Website Designing
- Website Development
- Java Development
- PHP Development
- WordPress
- Graphic Designing
- Logo
- Digital Marketing
- On Page and Off Page SEO
- PPC
- Content Development
- Corporate Training
- Classroom and Online Training
- Data Entry
Training For College Campus
JavaTpoint offers college campus training on Core Java, Advance Java, .Net, Android, Hadoop, PHP, Web Technology and Python. Please mail your requirement at [email protected]
Duration: 1 week to 2 week


