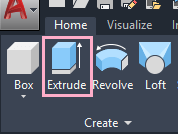
Please note, this is a STATIC archive of website www.javatpoint.com from 19 Jul 2022, cach3.com does not collect or store any user information, there is no "phishing" involved.
Javatpoint Logo
Javatpoint Logo

AutoCAD Extrude

The Extrude command in AutoCAD 3D is used to create a surface or solid of a 2D surface or a 3D curve.

Consider the below image:

AutoCAD Extrude

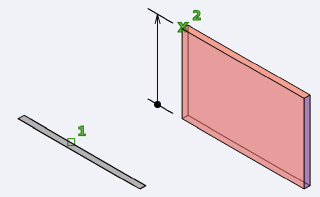
The Extrude command is widely used to create walls, shapes, etc.

Let's understand by few examples.

Example 1:

Consider the below 2D surface.

AutoCAD Extrude

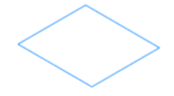
Here, we have created a rectangle.

  • To create a solid of the above figure, follow the below steps:
  1. Select Extrude command from the ribbon panel, as shown below:
    AutoCAD Extrude Or
    Type Extrude on the command line < press Enter.
  2. Select the object, which we want to Extrude.
    Here, we have selected the rectangle.
  3. Press Enter.
  4. Now, specify the height of the Extrude.
    We can specify the height in +Z or –Z direction.
    We can either determine the height with the cursor or by the value.
    Here, we have specified the value = 5.
    The object will now look like the below image:
AutoCAD Extrude
  • To create a surface of the 2D rectangle, follow the below steps:
  1. Type Extrude on the command line < press Enter.
  2. Type Mode or M on the command line < press Enter.
  3. Type Surface or SU on the command line < press Enter.
  4. Select the object to Extrude.
    Here, we have selected the rectangle.
  5. Press Enter.
  6. Specify the height of the Extrude.
    Here, we have specified the value = 3.
    The object will now look like the below image:
    AutoCAD Extrude
  • To Create using Direction/ path/ Taper Angle/ Expression, follow the below steps:
  1. Type Extrude on the command line < press Enter.
  2. Select the object, which we want to Extrude.
  3. Select one option from Direction/ path/ Taper Angle/ Expression.
    Here, we have selected Taper Angle.
  4. Press Enter.

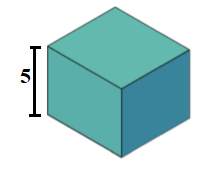
The figure will now appear as:

AutoCAD Extrude

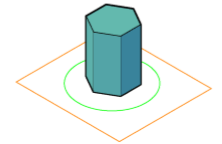
Example 2:

Consider the 2D object shown below:

AutoCAD Extrude

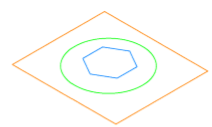
Here, we have drawn three objects.

The steps are listed below:

  1. Type Extrude on the command line < press Enter.
  2. Select the object.
    Here, we will first select the inner polygon.
  3. Press Enter.
  4. Specify the height. Here, we have entered height = 4.
    The object will appear as:
    AutoCAD Extrude
  5. Again, Type Extrude on the command line < press Enter.
  6. Select the object.
    Here, we will select the circle.
  7. Press Enter.
  8. Specify the height. Here, we have entered height = 5.
    The object will appear as:
    AutoCAD Extrude
  9. Again, Type Extrude on the command line < press Enter.
  10. Select the object.
    Here, we will select the outer rectangle.
  11. Press Enter.
  12. Specify the height. Here, we have entered height = 1.

The object in 3D will now look like the below image:

AutoCAD Extrude

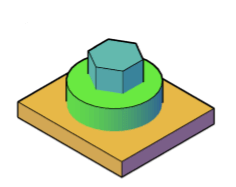
Similarly, we can create different objects, models, etc. with the help of the Extrude command.


Next TopicAutoCAD Revolve


Youtube For Videos Join Our Youtube Channel: Join Now

Feedback


Help Others, Please Share

facebook twitter pinterest

Learn Latest Tutorials


Preparation


Trending Technologies


B.Tech / MCA