| |

CoreDataCoreData is the framework provided by Apple to save, track, filter, and modify the data within the iOS applications. It is not the database, but it uses SQLite as it's persistent store. It is used to manage the model layer object in our application. It manages the object graphs, tracks the changes in the data, and modifies the data on the user interactions. In the previous section of the tutorial, we have seen how we can use user defaults to store the short pieces of data. However, in this section of the tutorial, we will discuss how to use the actual database framework like CoreData to store, modify, and filter the user's data in the application's database. How to use CoreData in iOS applicationHere, we will create an iOS application that includes CoreData as a framework to store and persist the data objects. Let's create a single view iOS application to demonstrate the basics of CoreData. To enable the app to use CoreData, we must check the Use CoreData option displayed at the bottom. 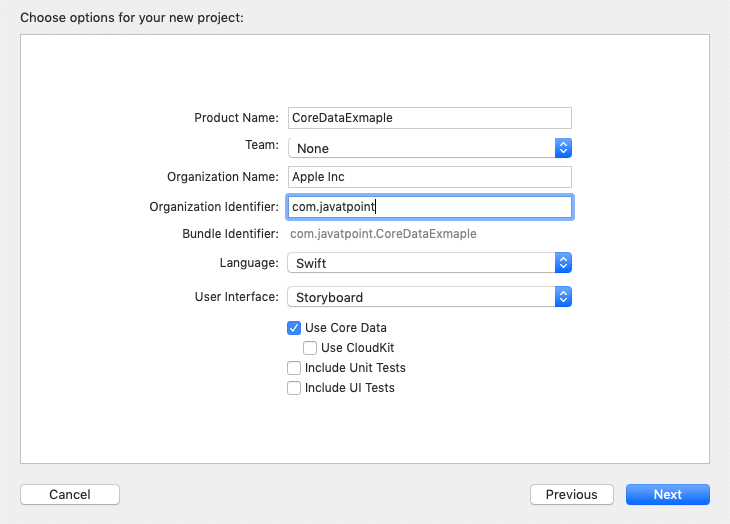
Now, we have successfully created the CoreDataExample project with CoreData support. There are two notable changes in the XCode project if we observe. First, The Core Data stack code has been added to the AppDelegate file. The CoreData stack code comes with clear documentation in the form of short comments. It sets up the persistentContainer and saves the data if there are any changes. The CoreData Stack Code is shown in the below image. 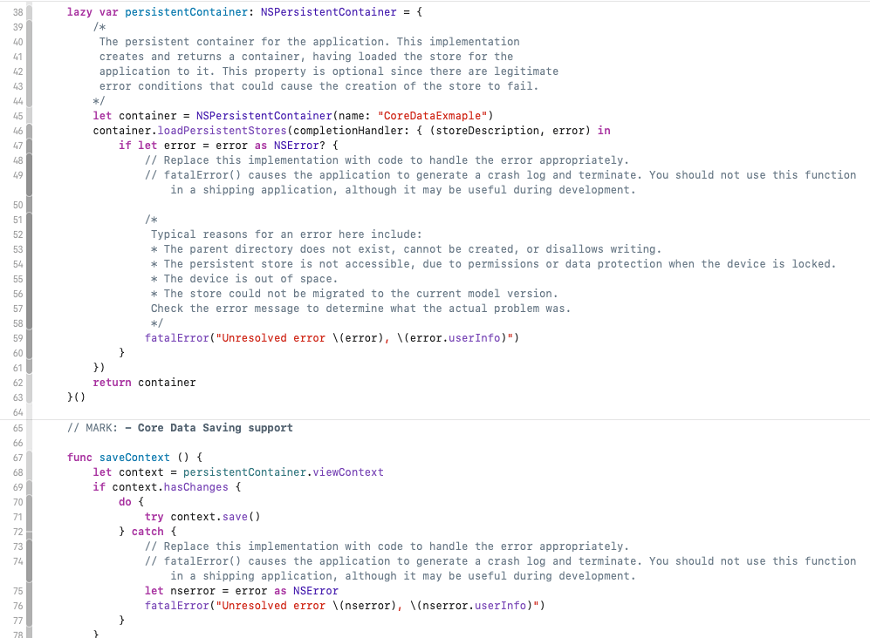
Second, the new file CoreDataExample.xcdatamodeld has been added to the Application's package. It acts as the model layer for the data. We can add the entity, attributes, and relations into the model layer. 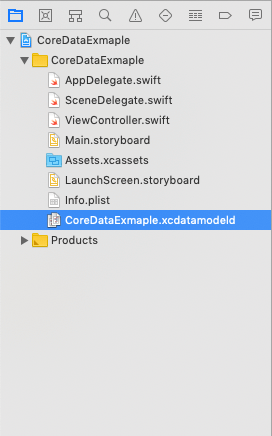
Adding the Entity to CoreData ModelWe can add an entity into the xcdatamodeld file by selecting an option Add Entity given at the bottom of the file. In the right pane of the file, we can add attributes, relationships, and fetched properties to the Entity. Here, we have created a Student entity and added three attributes id, age, and name in the model, as shown in the below image. 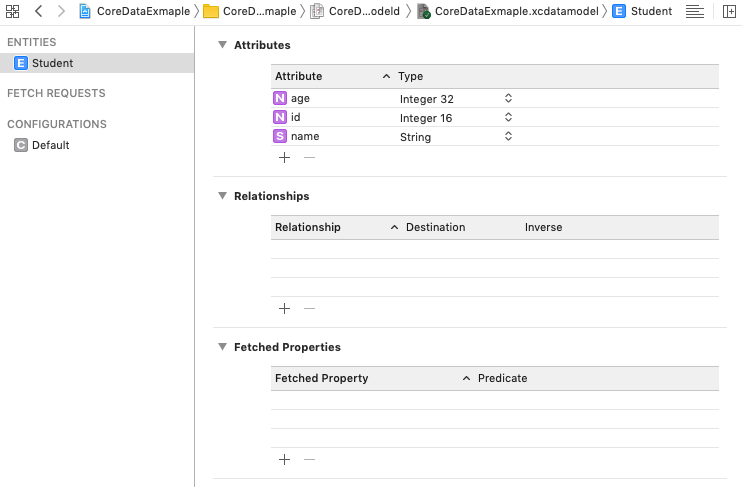
Now, we have created our model Student. Let's add some records into this model. The model will be saved to the CoreData. To add records to the model, we need to follow the following steps.
To refer to the persistentContainer, we need to instantiate the AppDelegate. The instance of the AppDelegate is formed using the following code. To create the context, we can use the persistentContainer reference using the below code. Now, we need to create the entity using the context reference, we just created. Now, we need to create the new Student record as the entity object. Now, let's add some records into the newly created entity object. We have created an AppDelegate object, the context, entity, and entity object. We have also set the values for the newly created entity object. Now, we need to save the data inside CoreData. To save the data, we use the context object to save the context. We have to wrap this code with the try-catch block. Now, if we run our application, our data will be saved inside the CoreData. The AppDelegate.swift and ViewController.swift file contains the following code. AppDelegate.swift ViewController.swift Fetching the recordsFetching the records from the CoreData is very simple. We need to instantitate the NSFetchRequest class and create a request object. We can pass this request object into the fetch() method for NSManagedContext reference. The following code can be used to fetch the data from the CoreData. Now, the ViewController.swift file contains the following code.
Next TopicManaged Object Model
|
 For Videos Join Our Youtube Channel: Join Now
Feedback
- Send your Feedback to [email protected]
Help Others, Please Share


Javatpoint Services
JavaTpoint offers too many high quality services. Mail us on [email protected], to get more information about given services.
- Website Designing
- Website Development
- Java Development
- PHP Development
- WordPress
- Graphic Designing
- Logo
- Digital Marketing
- On Page and Off Page SEO
- PPC
- Content Development
- Corporate Training
- Classroom and Online Training
- Data Entry
Training For College Campus
JavaTpoint offers college campus training on Core Java, Advance Java, .Net, Android, Hadoop, PHP, Web Technology and Python. Please mail your requirement at [email protected]
Duration: 1 week to 2 week


