| |

Working with UIBezierPath in iOS applicationsCreating User Interfaces is one of the most important tasks that mobile app development requires. Apple provides various ways to develop User Interface in the process of creating the iOS app. As iOS developers, we have multiple options to create the user interface of an app, including Storyboard and Swift UI. We can also make the User interfaces Programmatically using the classes provided by UIKit. While developing mobile apps, sometimes we need to create complicated UIs that may include different types of Shapes. This problem can be handled by using UIBezierPath class that is provided by Apple to create vector-based paths. Using this class, we can create different types of custom paths that may include any shape we want. We can use the custom paths to achieve various shapes like rectangle, square, oval, and circle. Using UIBezierPath, we can create highly complex shapes by just adding lines to some paths. We can add straight and curved lines to any path. The UIBezierPath requires a Core Graphics Context for rendering. We can use the following ways to create the Core Graphics Context to render a UIBezierPath in the iOS app.
In this tutorial, we will create an iOS app to see how we can create UIBezierPath to create custom shapes. We will also look at how we can use CAShapeLayer, and UIView to get a Core Graphics context to render UIBezierPath. Let's create a new iOS project in XCode, as shown below. 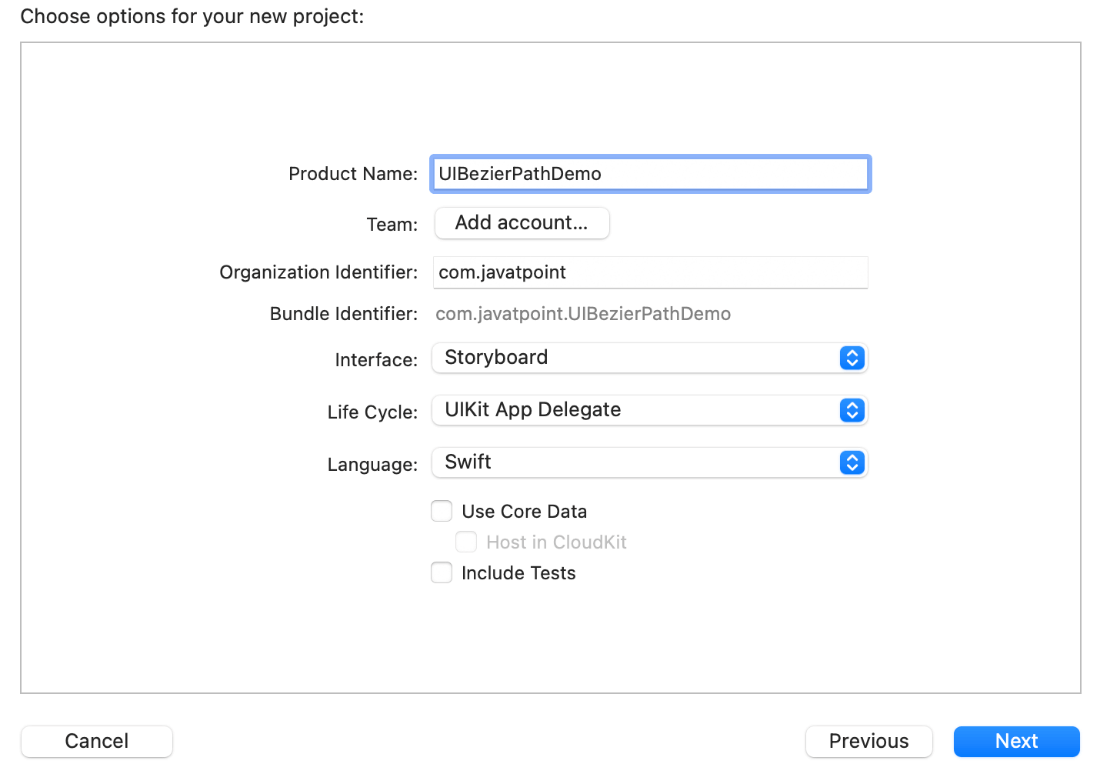
Once we are done creating the project, we need to create the subclass of the UIView as DemoPathView. 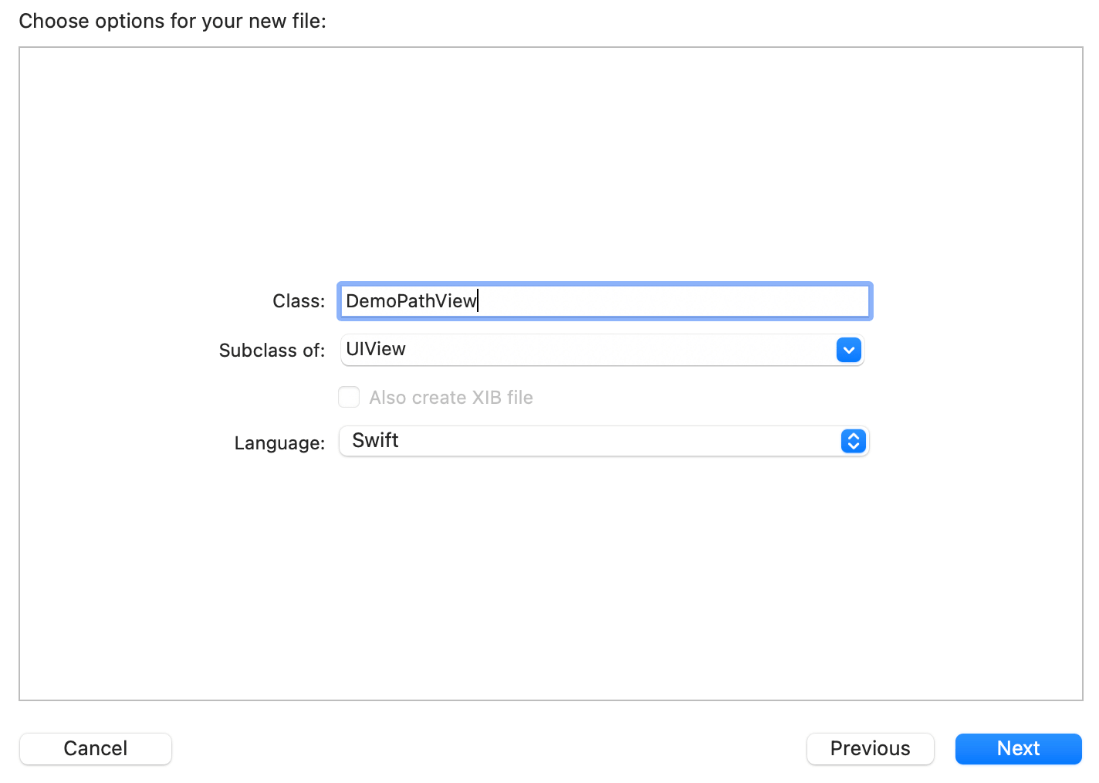
Now, add the following code to ViewController.swift file. The viewDidAppear(_ animated: Bool) method in the above code adds the demoView to the View Controller, which is an instance of the UIView Subclass. Now, we need to add the following code to the DemoPathView class. If we run the code on the simulator, we will get the following view shown on the Simulator. 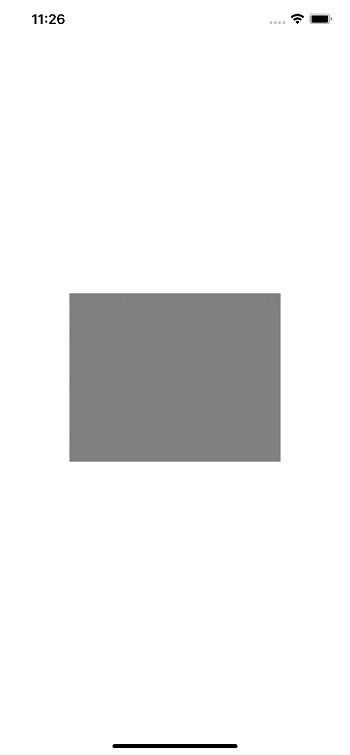
Now, let's create the instance of UIBezierPath to create the path and shapes in our iOS app. Let's create a Rectangular Shape in the following example. We need to call the createRectangle() in the draw() method of DemoPathView class. In the above code, we initialize the UIBezierPath object and add the lines to the path to create a rectangle, as shown below. 
However, we created the rectangle shape in the above example, but it is a bit pointless to draw a shape to outline the exact frame of the view. Creating TriangleTill now, we must have noticed in the tutorial, creating any shape requires specifying the appropriate points to the UIBezierpath. Let's create a triangle in the following example. Add the following code to DemoPathView class to create the rectangle. It will show the following triangle on the screen, as shown below. 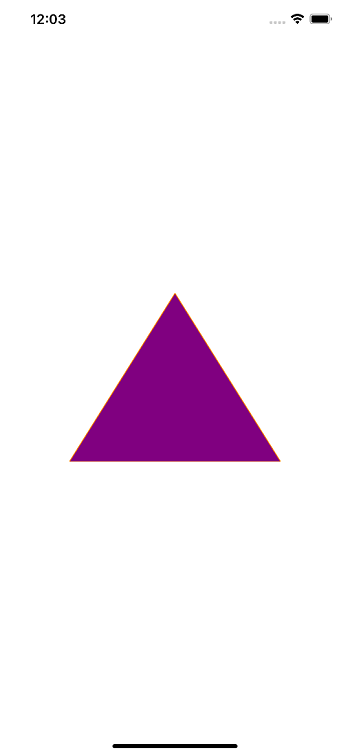
Creating OvalsWe can also create ovals using UIBezierpath. However, we need to use the different initializer methods of UIBezierpath(). 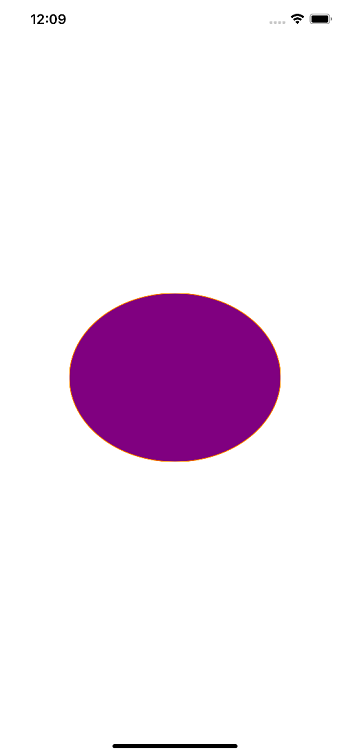
We can also provide the CGrect in the above initializer instead of providing self.bounds as shown below. 
Creating Rectangle with Rounded CornersTo create a rectangle with rounded corners, we need to use another Initializer, as shown below. The above code rounds the corners according to the value that is provided as the cornerRadius in the initializer. 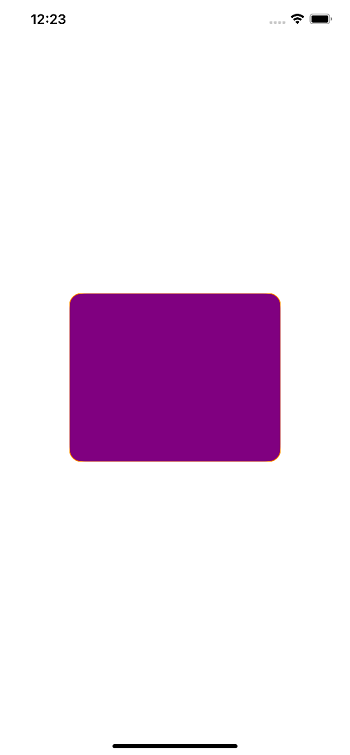
Sometimes, we need to round some random corner of the rectangle. In the following example, we will round only the top-left and bottom-right corners of the view. The initializer in the above code accepts the following parameters.

Creating ArcsWe can also create Arcs using UIBezierPath; however, it is complicated to create arcs using UIBezierPath. To create an arc, we need to use the following Initializer. The above initializer accepts the following parameters.
Let's create an example to draw the arc on the surface. For this purpose, add the following code in DemoPathView class. It will show the following view on the simulator. 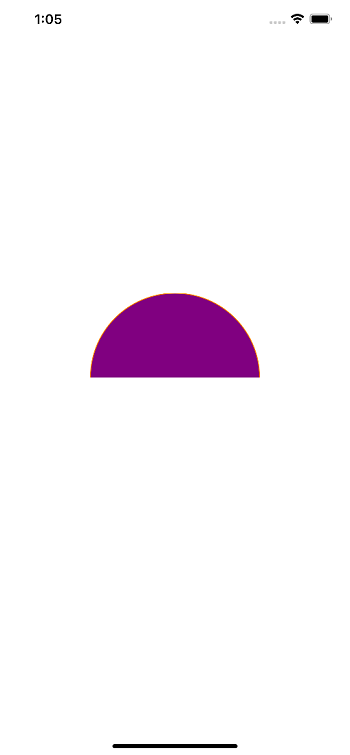
Creating UIBezierPath with CAShapeLayerIn this tutorial, we have created the subclass of UIView and overridden the draw(_ : ) method in the subclass. However, it is not required to override the draw() method every time we want to work with UIBezierPath in the iOS app. As we have already stated in the tutorial, we need to have the Core Graphics Context to render UIBezierPath. Instead of overriding the draw () method in the UIView subclass, we can use CAShapeLayer objects, which are rendered faster and provide flexibility. The CAShapeLayer class is a subclass of CALayer using which we can add extra layers to a view. It provides various properties that can be set to customize the outcome of a view. Most of the properties of CAShapeLayer are animatable in nature, i.e., the values of such properties can be changed in an animated manner. We must always provide the path of a CAShapeLayer every time we instantiate it. For this purpose, we can create a UIBezierPath first and then assign it to the CAShapeLayer object. We will use this approach in this tutorial. Along with setting the path for CAShapeLayer, we also need to set other properties like fill color, stroke color, line width, and position. There are two ways that a shape layer object can be used in the layer of the view, i.e., as a sublayer or as a mask. Let's create a simple CAShapeLayer Object first, which will also take place in our DemoPathView.swift class. We also need to comment out the entire draw() method that we implemented previously in this tutorial and create a CAshapeLayer object as given in the following code. The simpleShapeLayer() method implemented above will be called from our DemoPathView initializer. In this method, first, we call the createTraingle() method implemented previously in the tutorial. Here, the path defined to create the triangle will be set to the path property of our CAShapeLayer. Next, in this method, we create the CAShapeLayer object and assign the created UIBezier path to its path property. We also need to add this created CAShapeLayer to our view layer using the addSubLayer() method. Now, let's call this method from the initializer and look at the output it shows on the simulator. 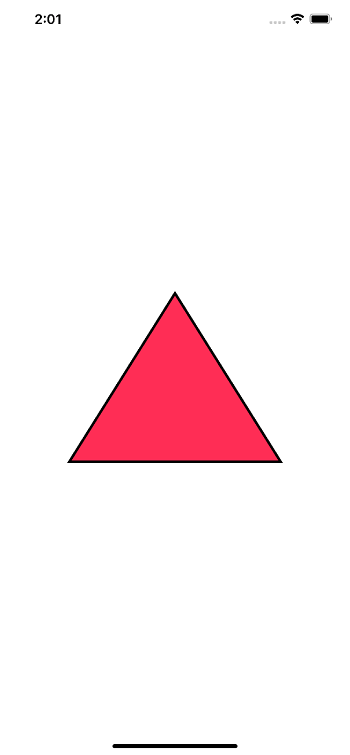
Using Shape Layer as mask or sublayerAs we have stated above in the tutorial, the CAShapeLayer can be used either as a mask or sublayer to the view. Let's create our CAShapeLayer object again but this time, let's give the background color of the view as black instead of having it as clear and see the difference. Let's look at the output shown in the simulator. 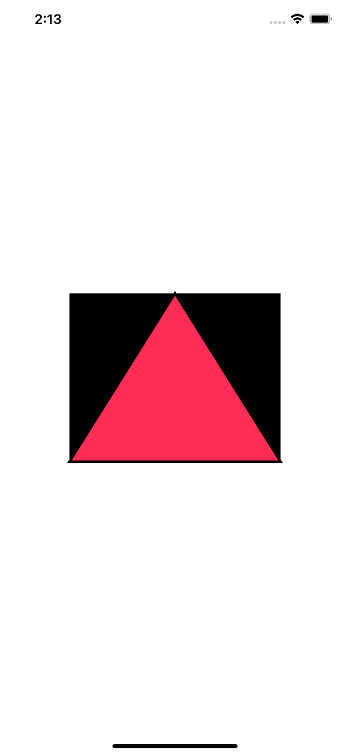
Here, we must observe that the path that is not filled with the fill color remains black. However, let's comment on the last statement in the simpleShapeLayer() method and add the following code instead. Now, it will show the following output on the simulator. 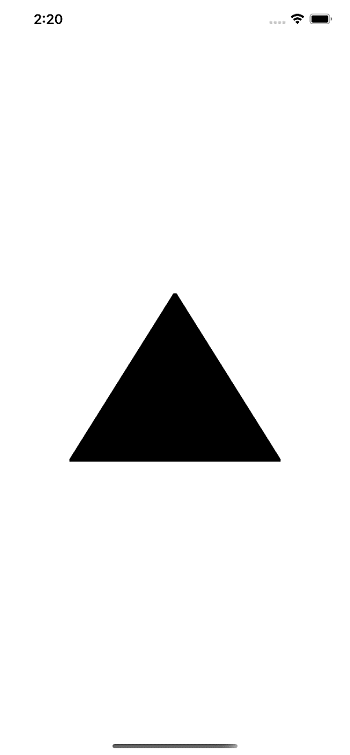
By seeing the output in both of the scenarios, we must observe that once we set the mask property of the view's layer to the shapeLayer, we see a complete triangle with black color despite the fact that we have given a fill color for the triangle. We also need to observe that the part of the view not covered by the path is not being shown. However, the mask works this way. Any part of the view that is not included by the path is clipped. Here, the complete view takes shape provided by the path. Here, the shape layer shows the background color of the view that is black for now. If we want to change the color of the layer, we need to change the background color of the view. Using CATextLayerThe CATextLayer class is similar to the CAShapeLayer class, although it works for the text shown on the layer. Using this class is to create a layer (like CAShapeLayer) to display some text. Most of the iOS app developers use UILabels to show text in the iOS application. In some cases, using UILabel doesn't work; we can use CATextLayer, where the multiple sublayers are added to the layer of the view that contains the label. Using CAtextLayer, we can add text layers on the top of any view. Let's create the following example where we create a text layer and add it to the top of the view layer. Let's add the following code to the ViewController.swift file of our project. It displays the following output on the simulator. 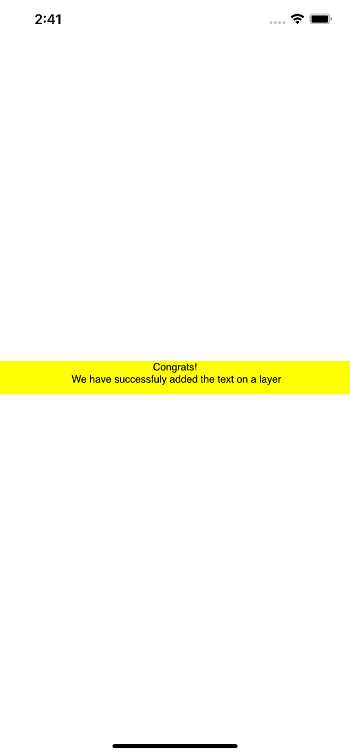
Next TopicSFSafariViewController in iOS
|
 For Videos Join Our Youtube Channel: Join Now
Feedback
- Send your Feedback to [email protected]
Help Others, Please Share


Javatpoint Services
JavaTpoint offers too many high quality services. Mail us on [email protected], to get more information about given services.
- Website Designing
- Website Development
- Java Development
- PHP Development
- WordPress
- Graphic Designing
- Logo
- Digital Marketing
- On Page and Off Page SEO
- PPC
- Content Development
- Corporate Training
- Classroom and Online Training
- Data Entry
Training For College Campus
JavaTpoint offers college campus training on Core Java, Advance Java, .Net, Android, Hadoop, PHP, Web Technology and Python. Please mail your requirement at [email protected]
Duration: 1 week to 2 week


