| |

UIBarButtonItem in iOSIn iOS app development, we often use toolbar and tab bar as an integral part of a user interface for ease of navigation. Adding buttons to the toolbar and tab bar has been a good idea since it simplifies the navigation, and most of the important screens in the app can be accessible in one place. For this purpose, Apple provides us the specialized button for the placement on a toolbar and tab bar represented by UIBarButtonItem class. The syntax for this class is given as follows. In the iOS app, we can add UIBarButtonItem by using the object library in Interface Builder. However, we can also create the UIBarButtonItem programmatically. We can customize the appearance of buttons by sending the setter messages to UIBarButtonItemApperance. We can also use customized buttons in standard places in a UINavigationItem object (backBarButtonItem, leftBarButtonItem, rightBarButtonItem) or a UIToolbar instance. In this tutorial, we will discuss how we can add UIBarButtonItems programmatically and by using Interface Builder in an iOS app. We will also discuss how we can add actions to Bar Button Items to perform specific operations when the user performs an event on the buttons. Adding UIBarButtonItem using Interface BuilderLet's create an XCode project as BarButtonExample, as shown below. 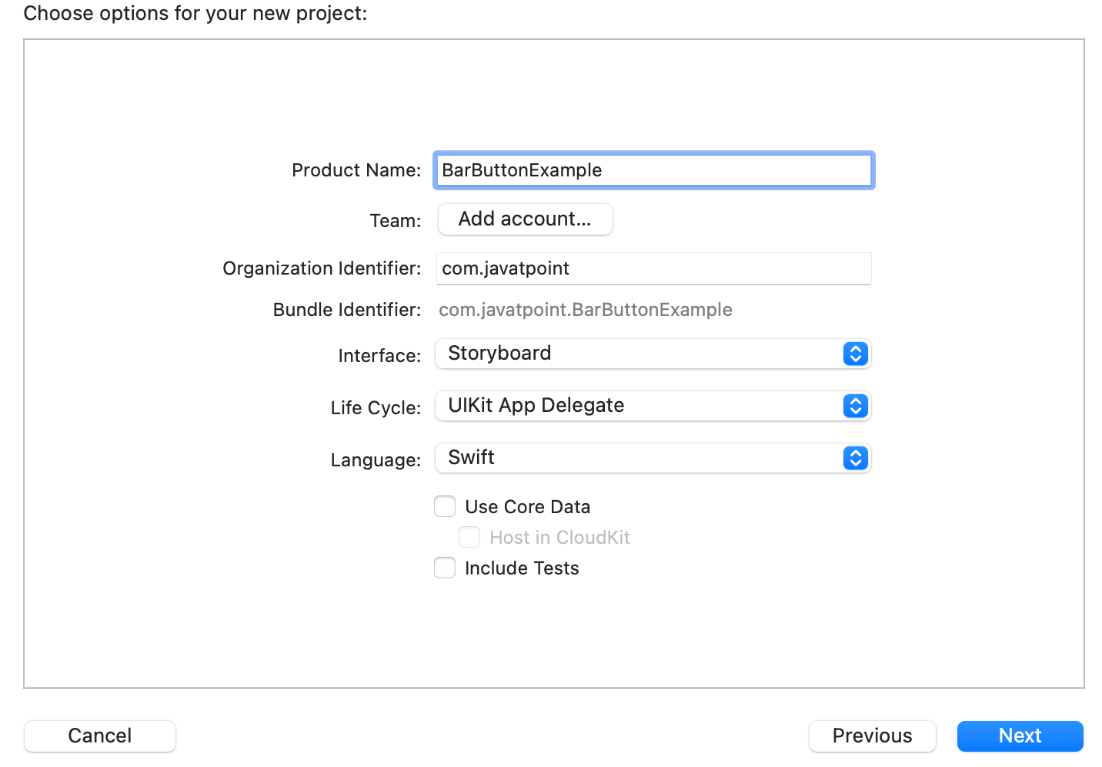
Once we are done creating the XCode project, open the Main.storyboard file and embed the current View Controller in a navigation controller to add the navigation bar to View Controller, as shown below. 
Once we embed the View Controller in Navigation Controller, we will see a navigation bar placed on the top of View Controller, as shown below. 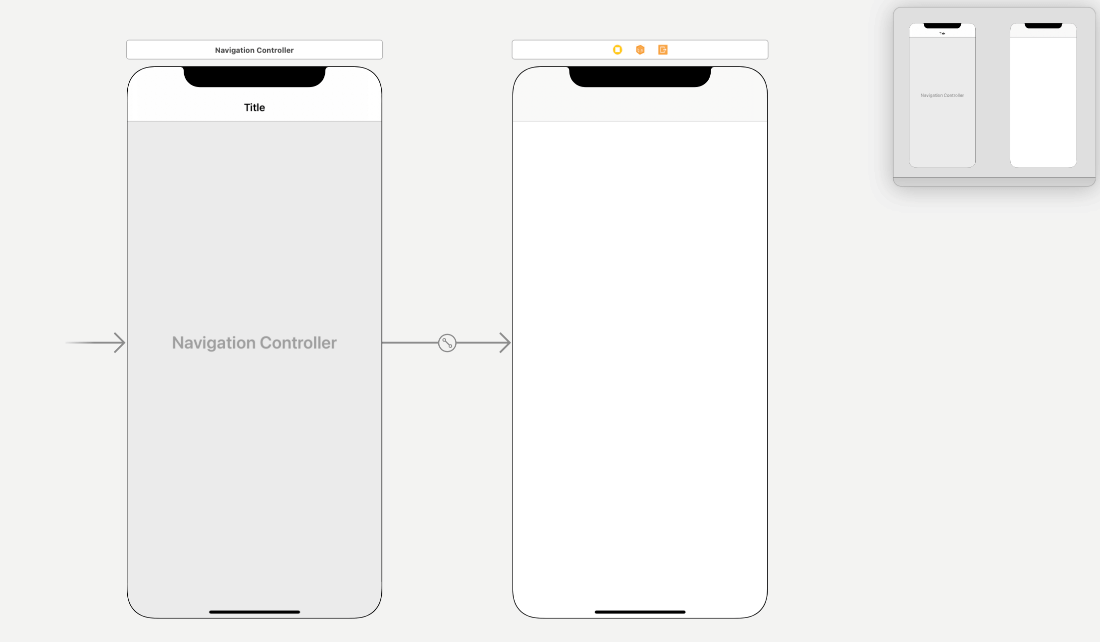
Now, our task is to customize the Navigation Bar of the View Controller. We can select the navigation bar and look into the Attribute inspector in XCode any time to configure our navigation bar. We can set the title, tint color, bar tint color, etc., according to our requirements. To add a bar button item in the View Controller, we need to search for it into the Object Library and drag the result onto the navigation bar as shown below. 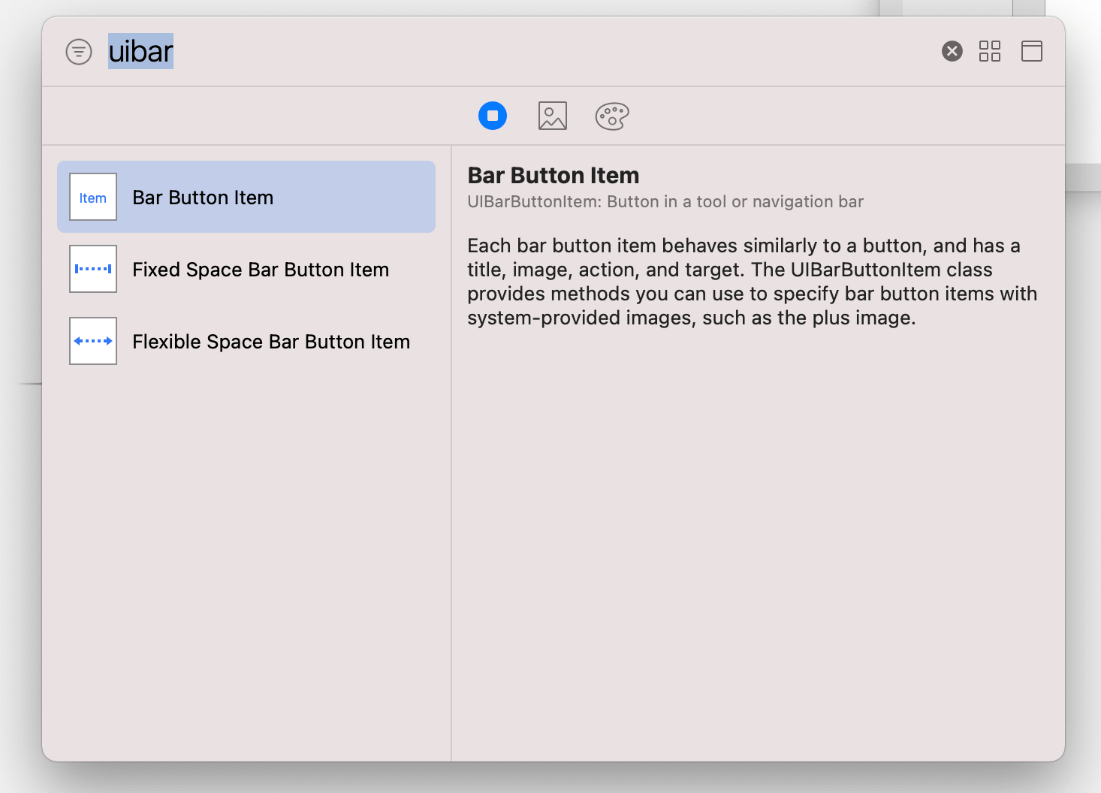
We can also customize the Bar Button item using Attribute Inspector in XCode. The options given for a bar button item in Attribute Inspector are shown in the below image. 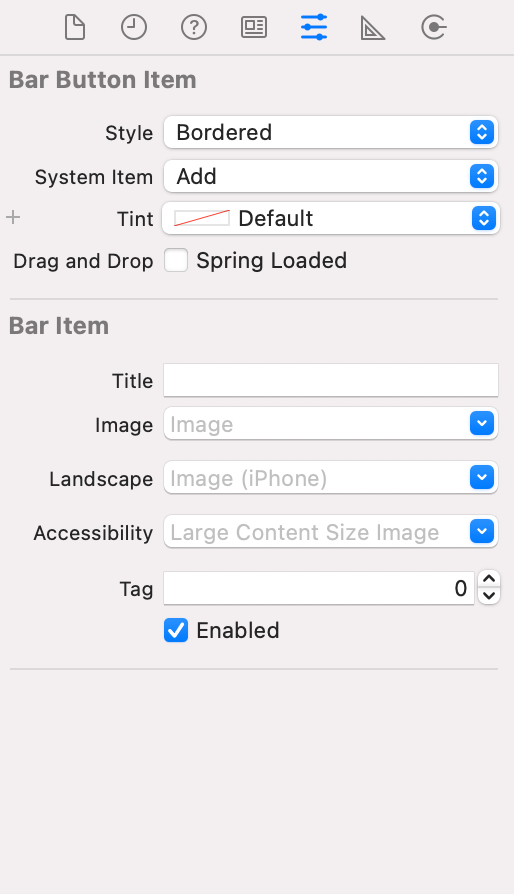
Here, we can set the title and image for the bar item. XCode provides various system items to be set as bar button items like Add, More, etc. In this example, we have created the bar button item to add items to the list. In the example, we have added the bar button item in the View Controller along with the title for the navigation bar. If we run the app on the simulator, it is shown below. 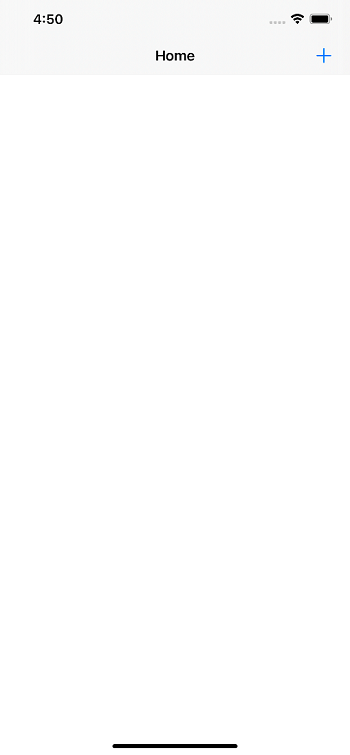
If we click on the add button given at the navigation bar, we will notice nothing. It happens because we haven't added any action for the add button yet in the ViewController.swift file. Let's create the action for add button in the View Controller as shown below. 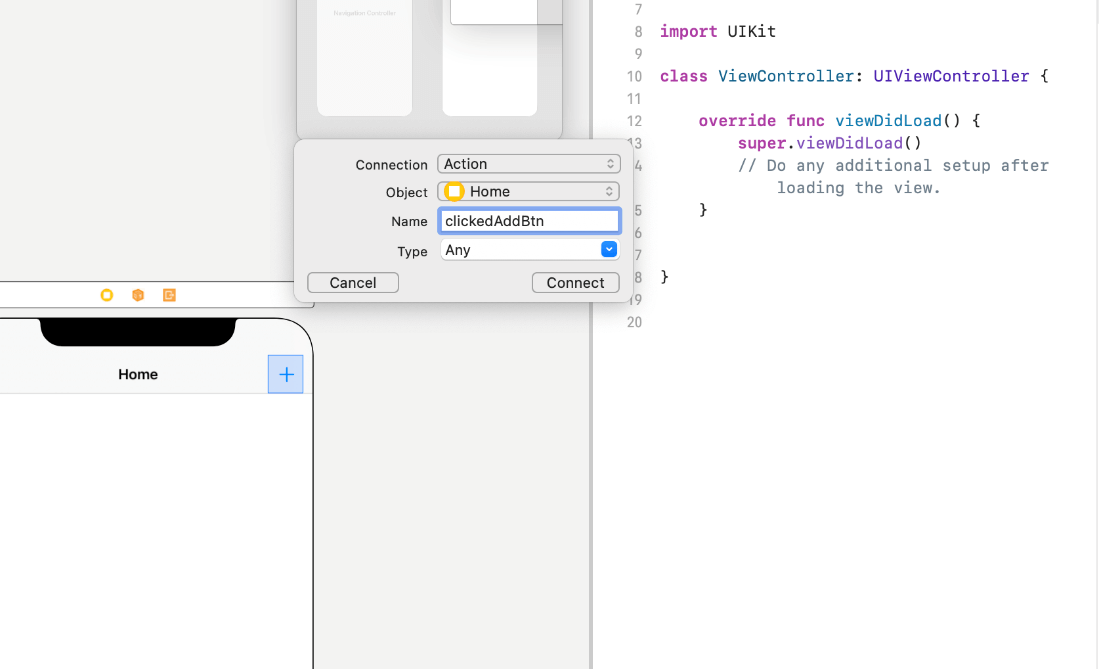
Let's finish the project now as we have added the action outlet for the add button now. Our project will show the list of Vehicles, along with their capacity and vehicle type. We have given the option to add any vehicle to the list if the user wants. Let's add the tableview to the View Controller in Main.storyboard to display the list to the user. 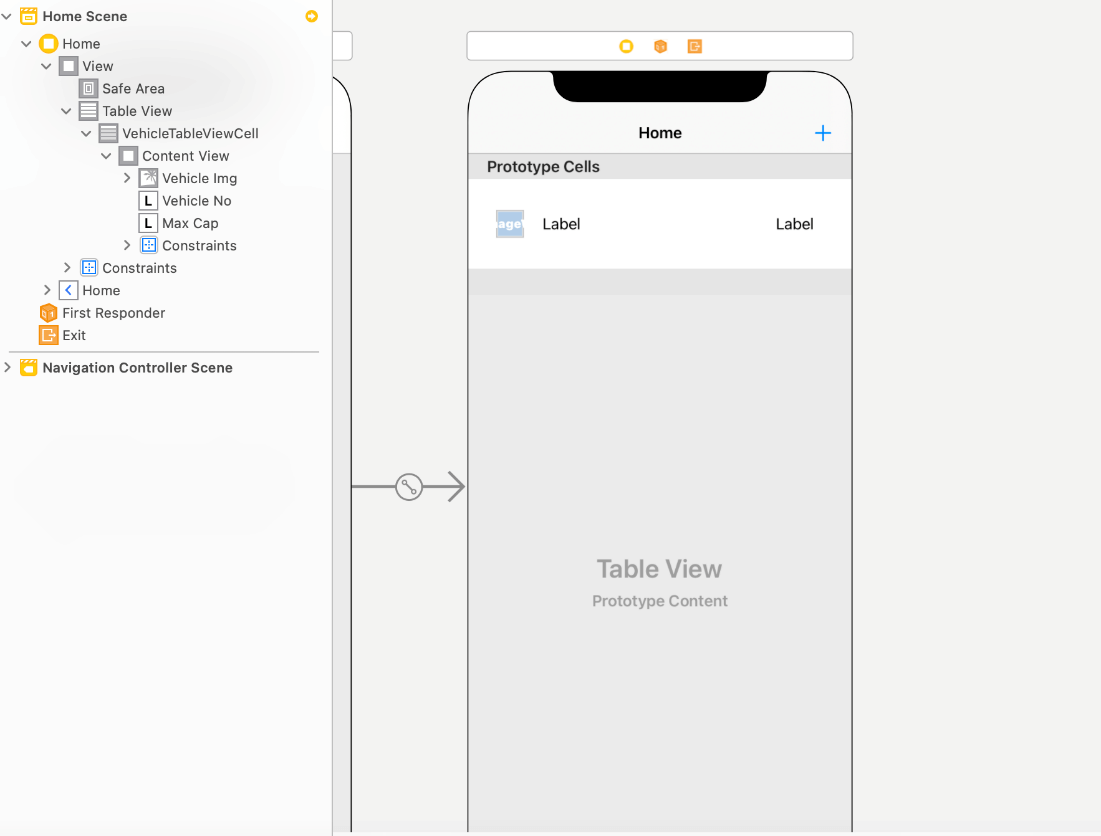
Our ViewController now contains a TableView which further includes a TableViewCell to display the vehicle data shown in the above screenshot. Let's implement the tableview Delegate and DataSource methods in the View Controller to display the list. Add the following code in ViewController.swift. ViewController.swift The above code does everything right; I.e., it implements the TableView Delegate and DataSource methods to display the list in the tableview. It also creates an array of objects as Vehicles which will be used as a DataSource array. However, the app will not display anything since the Array of VehicleModel is empty as we don't have any data yet in the application. The code of VehicleModel is given below. VehicleModel.swift Let's create some instances of the VehicleModel and add it to our DataSource array Vehicles. Add the following code to the viewDidLoad(:) method. Once we add the above code to viewDidLoad(: ), we will run our app on the simulator. It will show the Home Screen of the app, as shown below. 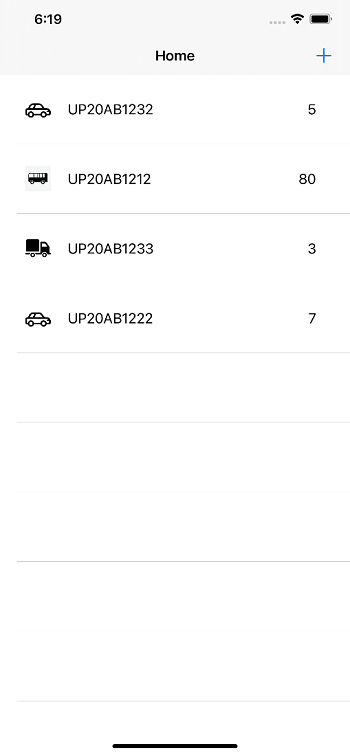
Now, let's add another View Controller to the project as AddVC, which will prompt the user to add another vehicle with some specific number, type, and Capacity. For this purpose, add a ViewController in the storyboard from the object library and add textfields and submit buttons so that the user can enter the vehicle information and submit it. 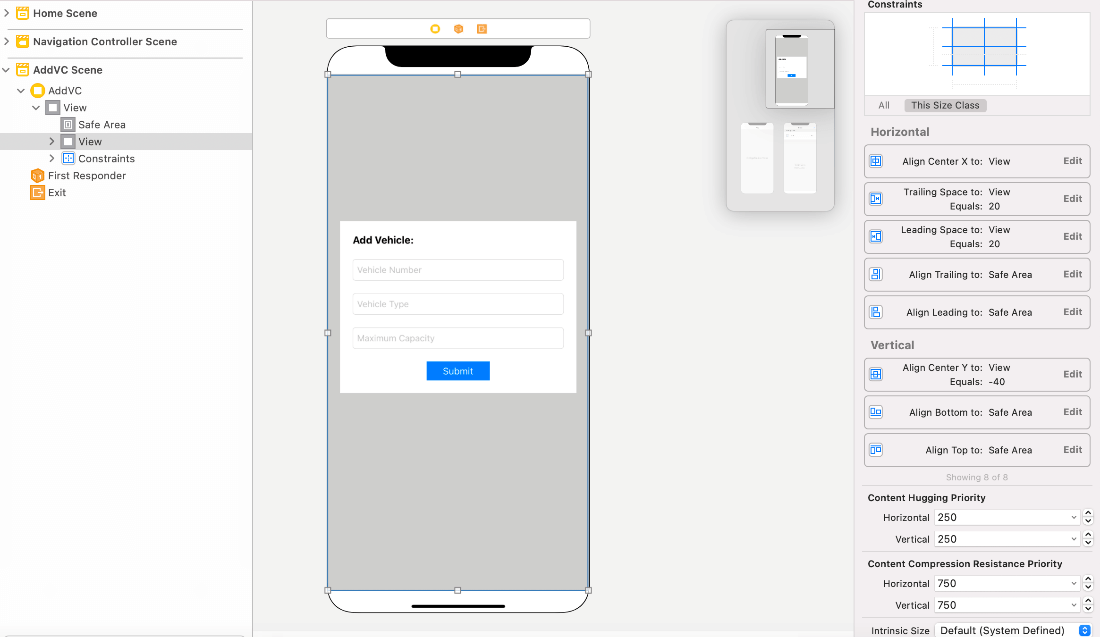
Let's create a new UIViewController Subclass as AddVC and assign it to the newly created View Controller in the storyboard. Add the following code to the AddVC. Let's present this View Controller when the user clicks the Add button on the Home View Controller. For this purpose, add the following code in the clickedAddBtn() method of ViewController. We are ready to run our app again on the simulator. The following screen will display once we click on the add button on the home view controller. 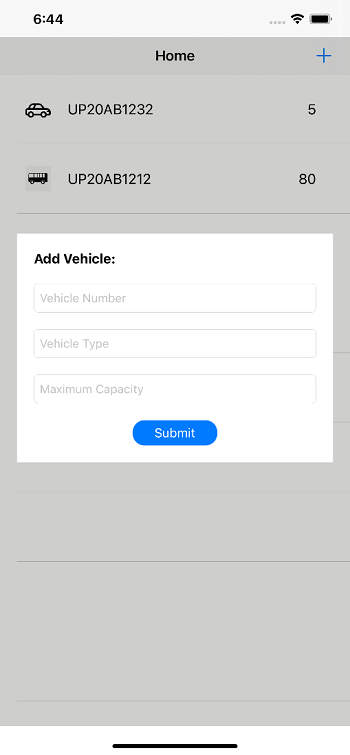
Our app should move back to Home Screen once the user enters the information and clicks submit. We should also look at the added vehicle in the vehicle list shown on Home Screen. For the navigation, let's create the protocol as AddVCDelegate, which contains the clickedSbmtBtn(vehicleData:VehicleModel) as given below. We need to create an AddVCDelegate type property in AddVC, which will call the clickedSbmtBtn() method. Add the following property to the AddVC. Also, add the following code to the action outlet of Submit button. We need to create an extension of our Home View Controller, which conforms to the AddVCDelegate protocol. Also, we need to define the clickedSbmtBtn() method as given below. The above code won't be effective until we assign the delegate property of the AddVC instance to self, as shown below. Now, we are done with the app tasks. Let's run the application and look at the app in the simulator. 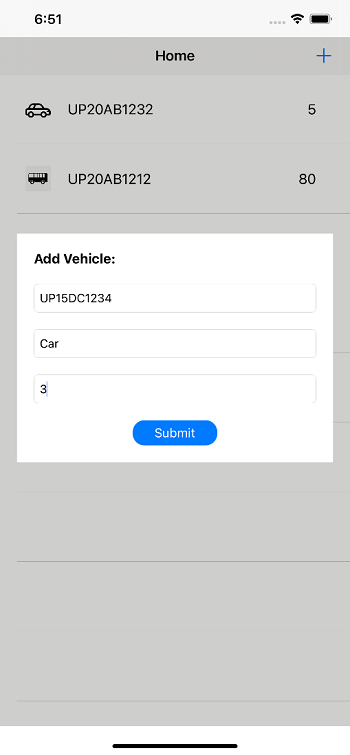
Now, click submit and see whether the tableview has been updated or not. 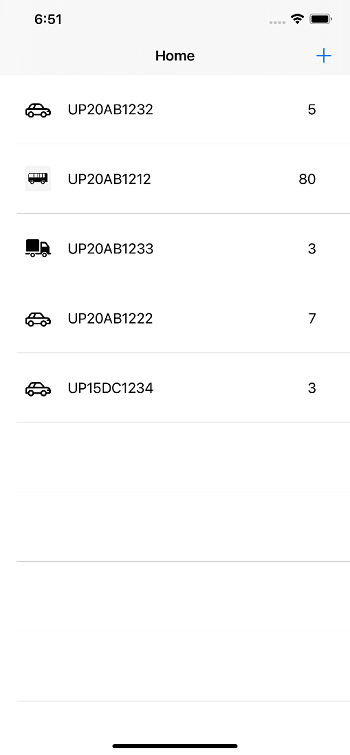
The complete code of the app is given as follows. ViewController.swift: AddVC.swift VehicleModel.swift VehicleTableViewCell.swift Programmatically creating UIBarButtonItem:Instead of adding it into Storyboard, we can create the instance of UIBarButtonItem class and add it to our navigation bar as given below. |
 For Videos Join Our Youtube Channel: Join Now
Feedback
- Send your Feedback to [email protected]
Help Others, Please Share


Javatpoint Services
JavaTpoint offers too many high quality services. Mail us on [email protected], to get more information about given services.
- Website Designing
- Website Development
- Java Development
- PHP Development
- WordPress
- Graphic Designing
- Logo
- Digital Marketing
- On Page and Off Page SEO
- PPC
- Content Development
- Corporate Training
- Classroom and Online Training
- Data Entry
Training For College Campus
JavaTpoint offers college campus training on Core Java, Advance Java, .Net, Android, Hadoop, PHP, Web Technology and Python. Please mail your requirement at [email protected]
Duration: 1 week to 2 week


